
 By Robby
How to Build a Handmade Concrete Waterfall
Intoduction
A handmade concrete waterfall can become one of the most individual features in a residential garden. Unlike a packaged waterfall assembled from repeated sections, its shape, height, water flow, color and sound can all be developed to suit its position.
It is also a rewarding project because you have considerable freedom to put your own stamp on it. That freedom does not mean you should start without a plan. You need a clear idea of what you want to achieve, preferably recorded in a sketch or simple computer drawing before work begins.
The waterfall can discharge into an existing pond or have its own lower catchment pond, allowing the same water to circulate continuously. It does not need to be particularly large. A carefully planned concrete waterfall with two or three well-formed drops can look and sound more convincing than a much taller feature where the water flow has not been properly controlled.
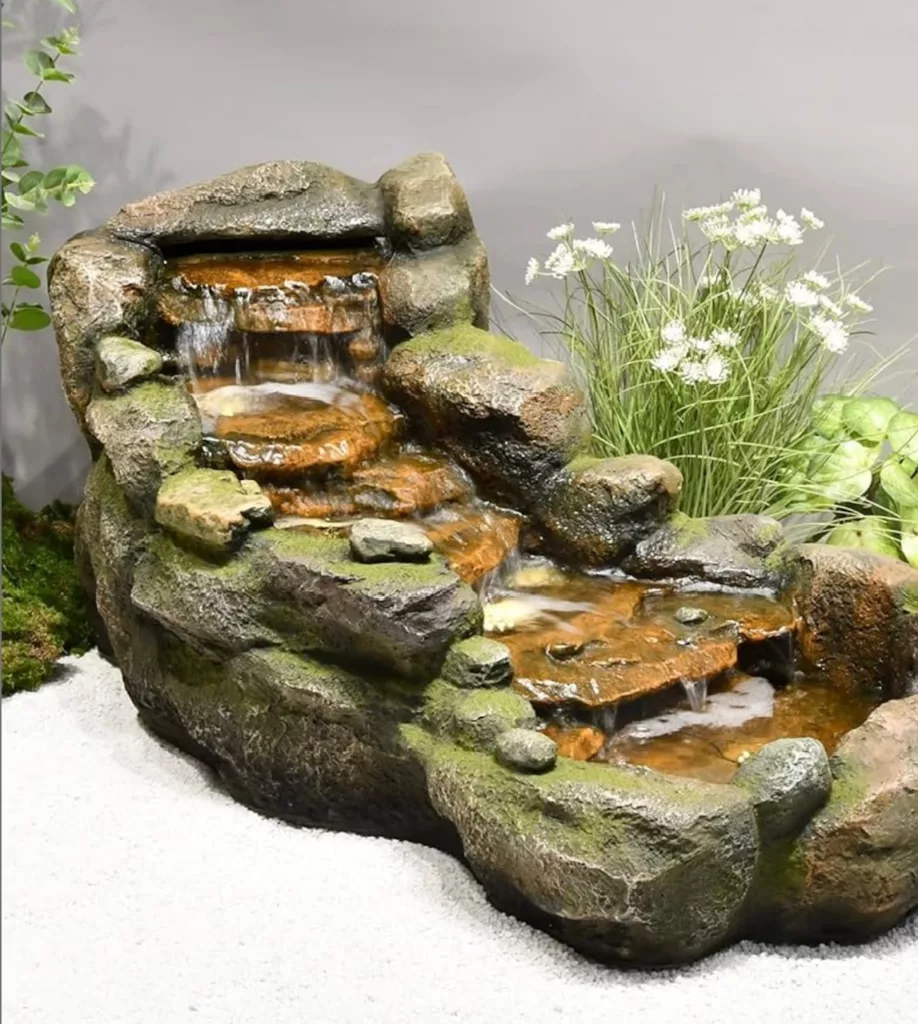
A handmade concrete waterfall is also a form of water fountain when pumped water is circulated through decorative outlets, pools and cascades. Some have center fountains in their catchment ponds. Many cast stone water fountains combine several effects, including spillways, overflowing bowls and waterfall drops. Individual cast stone bowls, channels, copings and decorative pieces can therefore be incorporated naturally into this type of project.
If the site already slopes, it makes complete sense to use the natural ground levels. This can reduce the amount of material and foundation work required while helping the finished concrete waterfall look as though it belongs in the garden.
I have personally built four residential concrete waterfalls and helped develop hundreds of custom waterfalls and water features during my professional career.
There is no single correct way to build a garden concrete waterfall. Certain principles, including a stable base, controlled water routes and accessible equipment, should always be respected, but the materials and construction methods can vary considerably. Many different approaches have produced successful waterfalls, while others have probably provided their builders with a useful education.
The encouraging part is that a handmade concrete waterfall can usually be adjusted as it develops. If a section does not look right or the water refuses to follow the intended route, you can often build up an edge, reshape a spillway, add another layer or introduce a well-positioned stone. Any cement mix is quite forgiving in that respect. You need a sound basic plan, but there is still plenty of room to experiment, solve problems and allow the feature to develop its own character.
This guide is not intended for a large concrete waterfall, pool structure or grotto. It covers a small or medium residential garden waterfall that can be largely built, shaped and finished by hand.
I/We promote transparency. This post or site may contain affiliate links. This means only if you make a purchase through these links, not just by clicking, I/we may earn a small commission at no extra cost to you.
As an Amazon Associate, I earn from qualifying purchases
About This Guide and Working Safely
This guide is based on methods I have used successfully during many years of practical work. They can be adapted to suit different ground conditions, available materials and intended appearances, and other variations may work equally well in your particular situation.
That does not mean one method will suit every site or every concrete waterfall. Ground conditions, climate, local requirements and the size and weight of the proposed structure may require a different approach or professional advice. My coloring and texturing methods are also based on techniques I have personally used with very good results, but there is still room to experiment with the final appearance.
Before digging, check for buried electrical cables, water pipes, drainage and other services.
Concrete blocks, cast stone pieces and bags of material can be heavy, so ask for help or use suitable lifting equipment when needed. Wear gloves and eye protection when mixing or placing concrete and mortar. Wet cement can cause skin burns, while cutting masonry and handling dry cement or sand can produce harmful dust. Use suitable respiratory protection and control the dust wherever possible. Wet-cutting equipment can greatly reduce the amount of airborne dust.
Water and electricity require particular care. Use equipment intended for outdoor and wet locations, keep electrical routes separate from water pipework, and provide the protection required in your area. Disconnect the pump and lighting supply before reaching into the pond or working on any part of the circulation system. Requirements for electrical work, excavation, pond safety and permits vary across the United States. Check the rules applying in your area and use a suitably qualified contractor where the work is outside your experience or local requirements demand it
Selecting a Location for Your Handmade Concrete Waterfall
The position may already be partly decided if the waterfall will discharge into an existing pond or pool, but there may still be several possible positions available around it.
Start by looking at the natural shape of the ground. Could an existing slope become part of the waterfall? Is there a wall, bank, group of plants or another backdrop that would help it blend naturally into the garden?
The concrete waterfall does not necessarily have to sit immediately beside the pond. As long as the ground does not slope dramatically in the opposite direction, a short connecting stream may be practical. Ideally, the ground will already fall naturally toward the pond. Depending on the available space, the stream could make the complete feature much more interesting and might even create an opportunity for stepping stones or a small bridge.
Consider where you would most enjoy seeing the finished feature. The main view may be from a patio or seating area, but it could just as easily be from a breakfast room, living room, entrance or another favorite part of the garden.
Ideally, the waterfall should look as though it belongs within the landscape, rather than appearing to have been placed in the only empty corner available.
Practicalities still have their say. Think about how far the water pipe and electrical supply will need to be run. A position on the opposite side of the garden may look wonderful, but the extra trenching, protected electrical supply and pipework through prized planting areas could add considerably to the work and cost. However, it may still be worth considering if using the natural slope reduces the amount of excavation, filling and structural work required elsewhere.
Spending a little time exploring these possibilities can save money later and turn a straightforward waterfall into a feature that connects naturally with the rest of the garden.
Plan the Height and Water Routes
Once you have chosen the location, mark the proposed concrete waterfall and pond on the ground with sand. This helps you and anyone working with you visualize its true size.
If the shape is difficult to picture, add small wooden stakes around the outline. Use one taller stake to show the highest point and, if helpful, others to mark the levels of the intermediate pools. The more complicated the design, the more useful these simple markers become.
Stand back and inspect it from every important viewing position. A full-size outline will tell you far more about the proportions than a drawing on a table and may prevent the finished waterfall from overwhelming the garden through either its height or footprint. I think this step is very important for those that have difficulties visualising a final project.
Height creates visual impact and more opportunities for the sound of falling water, but it also means:
- A pump capable of maintaining the required flow at the full head height.
- More opportunity for water to escape through wind and splashing.
- Additional pipework and construction.
- Potentially larger and stronger foundations.
More tiers do not automatically produce a better waterfall. Each should have a purpose, such as creating a distinct drop, creating additional water channels, changing the direction of flow or holding a shallow pool before releasing the water into the next cascade. These different levels can also create inviting places for birds to bathe and other wildlife to sneak in for a drink.
Additional height may be useful when the waterfall will form a backdrop, screen an unattractive view or create a focal point visible from a particular room.
Consider the sound as well as the appearance. Water dropping into a deeper pool sounds different from water passing over a broad, shallow spillway. A gentle flow can be just as effective as a heavy rush of water, particularly near a seating area.
Changes can still be made as the project develops, but I recommend having the overall water route planned before permanent construction begins. Decide:
- Whether the water will emerge at the top through a bubbler or a wider outlet. This may affect the size and shape of the upper pool.
- The route it will follow through the intermediate pools and spillways.
- The drop between each level. I prefer varying these heights because it produces a more interesting appearance and sound.
- Where the water will finally return to the lower pool, as this is probably where construction will begin.
Water follows the falls and levels you create. Even a small unintended low point can send it somewhere that never appeared in the plan.
Decide Where the Water Will Collect
If the waterfall is being added to an existing pond, the pond will normally provide the necessary water storage. The pump can be positioned in or beside it, depending on the pump and filtration arrangement being used.
If there is no existing pond, the concrete waterfall will need its own visible lower catchment pool. Concealed reservoir systems use a different construction method and are not covered in this guide.
A visible lower pool adds to the ambiance, benefits garden wildlife and, if designed with sufficient depth and suitable filtration, may even support fish. It also makes the working parts easier to monitor. You can see changes in the water level, reach the pump intake and spot unexpected water loss before it becomes a larger problem.
The size of this pool should not be decided by appearance alone. When the pump starts, water leaves the lower pool to fill the outlet pipework, tiers and intermediate holding pools. The level will continue to fall until the water completes its journey, returning through the waterfall and back to the pond.
This difference may be barely noticeable in a small ornamental feature. However, the lower pool must contain enough water to ill the pipework, tiers and intermediate pools while keeping the pump intake safely covered.
This is much easier to allow for during planning than to correct after construction. For a modest garden waterfall, making the catchment pool a little larger is usually the safest and least expensive approach.
Before finalizing the waterfall’s appearance, decide where the water will collect and how it will return to the top. The basic principle is simple: the pump draws water from the lowest collection point, sends it through pipework to the highest outlet, and gravity brings it back down again.
A wider pool spreads the required water across a greater surface area, making the startup drop less noticeable. If space is limited, the pool can be made deeper to provide the necessary volume, but the change in level will be more visible. This may expose part of the pool wall, marginal plants or anything arranged around the upper waterline.
Water will also be lost gradually through evaporation, wind and splashing. Rain may help with topping up, while excess water should leave through a properly positioned overflow. Where the levels allow, that overflow can be directed toward a planted area rather than letting useful water go to waste.
Keep the Pump and Connections Accessible
Deciding where the pump, strainer, valves and pipe connections will be located is an important part of the planning. All of them will need to remain accessible for routine cleaning, adjustment, servicing or possible replacement.
Hiding the equipment may improve the appearance, but do not trap it permanently behind concrete without an adequate access point. Pipes and connections can usually be screened with removable artificial rocks, plants or a properly designed access cover.
A small or moderate-sized concrete waterfall with a submersible pump is often simpler. If you leave sufficient spare electrical cable and flexible outlet pipe, the pump can be switched off, disconnected and lifted from the pool for servicing beside it. Make sure it can be lifted by its body or a suitable handle rather than pulling it out by the electrical cable.
Prepare the Foundation and Lower Pool
This guide is intended for a small or moderate-sized residential concrete waterfall that can be built mainly by hand. If the design begins to require a large structural shell, substantial retaining work or heavy construction equipment, it has probably moved beyond a sensible DIY project.
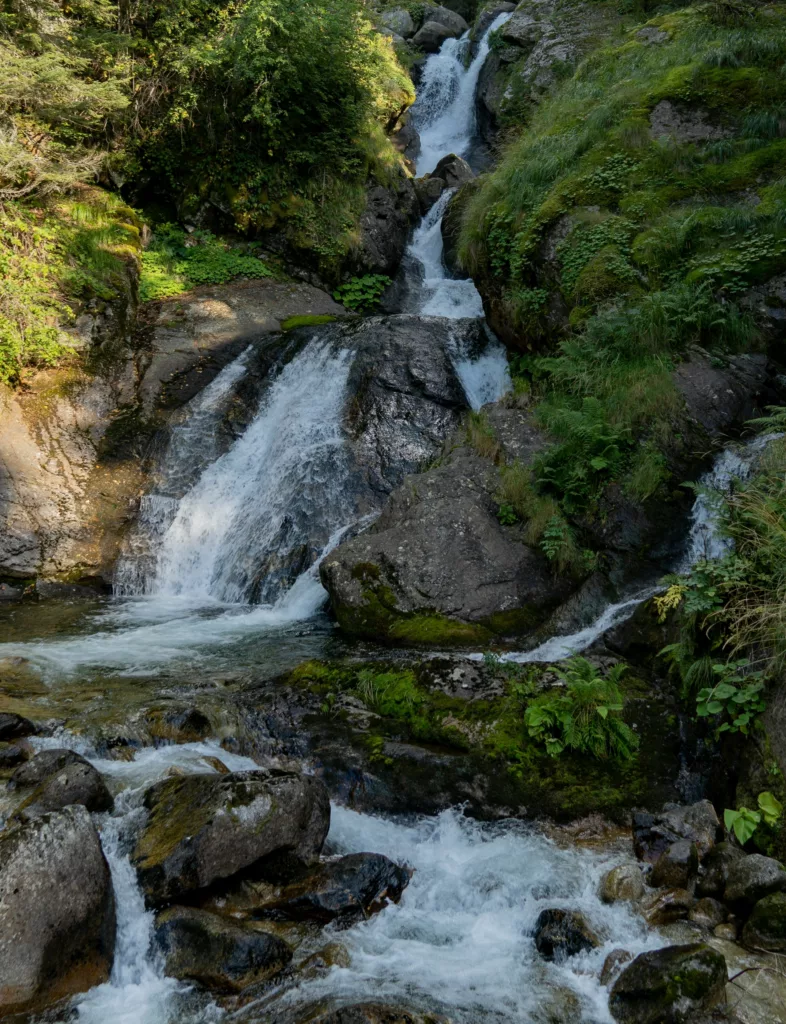
A natural slope is different because it can provide height without requiring you to build a large artificial structure. Using the existing terrain may allow the waterfall to travel farther and create several drops while keeping the construction manageable.
With the location, outline and approximate height established, install a few marker pegs or simple profiles before digging. Stringlines between them will provide permanent reference points after the sand outline and other temporary markings have disappeared.
Remove the grass, roots, organic topsoil and any soft or disturbed ground beneath the proposed waterfall and lower pool. If you find deeper areas of unsuitable ground, dig them out, replace them with suitable fill and compact it properly.
The amount of excavation will depend mainly on the depth of the topsoil and the condition of the ground. A waterfall within the size range covered by this guide should normally be suitable for a straightforward foundation or slab. If the ground remains questionable or the feature has grown heavier than originally intended, this would be a sensible time to ask for some outside help.
Before placing any sub-base, install the pipes, sleeves or ducts that need to pass beneath the construction. Providing them now is much easier and cheaper than drilling through or tunneling beneath hardened concrete later.
Use generously sized ducts with sweeping bends rather than tight corners. If you have not decided on the exact position of every connection, an additional empty duct or two may be useful for future pipework, lighting or controls. Electrical services should have their own separate duct and follow the requirements that apply in your area.
Backfill and compact all trenches carefully, particularly where they pass beneath the slab or other concrete work. A poorly compacted trench can settle later and leave the concrete above it trying to bridge the gap, usually without much enthusiasm.
A crushed-stone sub-base is not essential beneath every small waterfall built on good, undisturbed ground. It is useful for replacing removed material, creating a firm and even surface, improving drainage and avoiding the cost of filling unnecessary depth with concrete. Where it is used, spread it evenly and compact it thoroughly beneath the area that will carry the waterfall.
A small feature on firm ground may not require a reinforced slab beneath the entire structure. There is no single foundation detail that suits every garden, so the foundation should be judged according to the ground, weight and chosen construction method.
A square slab is easier to form, but if you have the necessary skills, plastic flexible formwork can follow the waterfall’s footprint more closely. This saves concrete and reduces the amount of exposed slab that would otherwise need to be creatively covered later.
Choose How to Form the Lower Pool
The three main DIY choices for the lower pool are:
- A flexible 45-mil EPDM rubber liner.
- A preformed HDPE pond.
- A preformed fiberglass pond.
A concrete, block-built or shotcrete pool is also possible, but it introduces a different level of construction, waterproofing and cost. Those methods are outside the main scope of this guide.
The lower pool does not always have to be completed before work begins on the upper waterfall. The order will depend on the design and how closely the two parts are connected.
Whichever pool method you choose, its size must provide the water capacity already discussed, with enough depth at the pump position to keep the intake supplied while the waterfall is running. The pump should remain reachable without draining or dismantling half the feature.
Take particular care with the upper edge of the pool. Water will immediately reveal an edge that is out of level, even when the difference was difficult to see during construction. A laser level is ideal if you have one available.
Plan the overflow at the same time. Its height will control the maximum water level after heavy rain or when the pump is switched off and water returns from the upper tiers. I prefer to position the overflow close to the underside of any coping stones, where it can work without becoming an obvious part of the finished pool.
Direct the overflow somewhere it cannot wash out the new construction or threaten another structure. Where practical, the water can be directed to a planted area or collected for later use in the garden.
You can begin building the upper waterfall before every detail of the lower pool is complete, but only if any remaining excavation will not undermine the waterfall’s foundation.
If a preformed pond has already been set level and correctly backfilled, take extra care when continuing construction beside it. If it is knocked out of level at this stage, correcting it may require only a shovel, a level and perhaps some grumbling. but if this goes unnoticed, and once adjoining concrete has been placed and linked to the upper structure, the same correction will usually involve considerably more work and frustration.
A flexible liner is much easier to adjust before the final coping or decorative stones have been laid around its upper edge. Peel back the liner where necessary and use a very lean sand and Portland cement mix to restore the supporting surface to the correct level before replacing it.
Detailing with Color and Texture
Prepping is the name of the game for how to build handmade concrete waterfall. Before diving into the fun part—adding the color and texture. Start by cleaning off any dirt or loose concrete from your rough structure, especially if it has been a while since you poured the first layer. Giving it a light rinse with water helps remove dust, and helps to ensure the next layer sticks well. If you’re looking for extra insurance on adhesion, a thin coat of PVA bonding can work wonders.
Get your colored concrete mixes ready. You’re going to want them a bit stronger than the base mix to handle the wear and tear from the water. This mix should be made with coarse and a fine sand blend and the extra cement, a little liquid PVA bonding agent, and your concrete fibers. A short fiber is best for this top coat and one that picks up the color. With most fibers you can go over the surface with a plumber’s torch to burn off any protruding fibers

Think of colors that blend well together; gritty browns, slate grays, mossy greens. Mixing these in different proportions can create a natural rock look that’s hard to beat. You might find it helpful at this point to make up a few small sample batches and practice how they blend and look together.

How To Build Handmade Concrete Waterfall Comes Down To Shaping and Blending
Hand-shape the look-a-like rocks. Using your gloved hands, and then hard sponges, begin forming the rocks and crevices. Sponges are great for achieving that realistic, weathered stone texture and blending the wet colors bleeding them together, similar techniques as artists use on their canvases. Build/throw in the colors then subtly blend them together to mimic nature’s randomness. Don’t be afraid to take your time here. If you’ve got a higher design, you might need to do this in sections, letting them set before moving on to the next part. But don’t stop at any point where water is intended to sit, always at least a little higher of these situations.
How To Build Handmade Concrete Waterfall With Good Water Ways
How to build handmade concrete waterfall comes down to focusing on where the water will flow. The paths where the water cascades down should be clearly defined even if you intend to create small pools.
If you did buy any pieces of real stone now is the time to break them out. Hopefully, you have some flat pieces with some texture on them, use these as stamps, by applying some release agent to their surface and pressing into the still semi-wet concrete. Or you might want to build these flat pieces into your design as the spillways. Don’t use any release on those if that is your choice, just wet them and a little wet cement slurry on their backs.
If you did incorporate small holding pools at different points, take extra care shaping these areas. Ensuring the concrete is solid but still has a natural look with the colors. Water always smooths out hard rocks in the real world. Fill any gaps or holes to avoid water leaking through and causing erosion. Don’t forget your bottom pool if you have no pond. Make this a good size so you can pump more water and have the desired acoustic ambience you want. Your pipe to your pump should be at the deepest point of the bottom pool, which needs to hold plenty of water.

Check over your work. Before everything sets, step back and look at the overall design. Adjust any areas where the colors might not blend well or where the texture looks off. This is not your last chance to be perfect with the details, but it is the easiest way and best time. It saves you from having to complete another full or partial coat just to make your waterfall fully functional and unique.
If you are at all concerned about any leakage in your pooling areas, perhaps you should consider buying some liquid waterproofer and making up a little special mix to the manufacturer’s instructions for these areas. After all, how to build handmade concrete waterfall would be no good if it leaked.
Final Touches and Functional Integration
Once your structure is set and detailed, it’s time to move on to the finishing touches that will bring your waterfall to life. Start by cleaning up any excess concrete splatters or debris that may have accumulated during the build. A simple brush and some water should do the trick.
Now, prepare the spots for your plants. Adding good quality soil around and in between the rocks will create perfect planter pockets. Choose plants that thrive in moist environments and add visual interest. Think ferns, mosses, or even small flowering plants. Placing these strategically will not only beautify your waterfall but also help in softening the look of the concrete rocks.
Hooking Up Your Plumbing And Pump
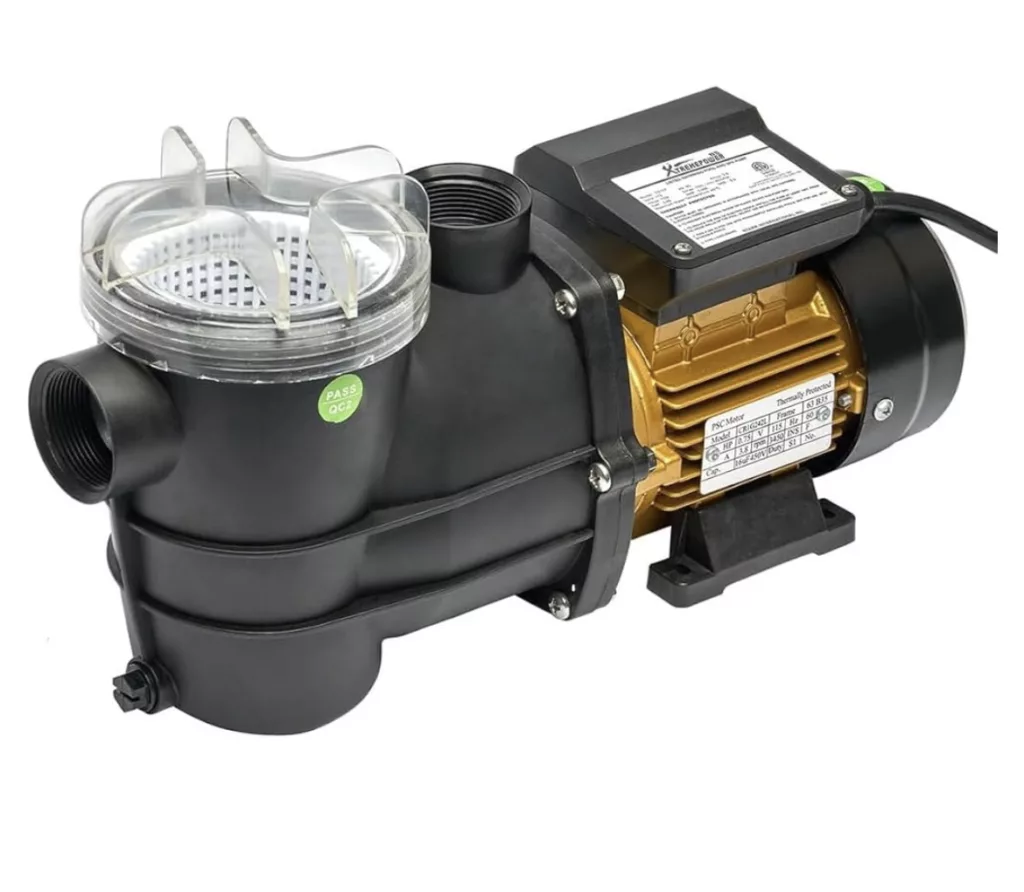
Get your pump ready. First, make sure it can provide enough water flow and can lift (head height) the water to the required height. The one pictured above can handle the height and the volume, has a strainer basket all for $81.95 the last time I looked. Connect it to the plumbing you laid earlier, its always best to add ball valves to tweak the water flow and to isolate if any maintenance is required, and then follow the manufacturer’s instructions to prime it. You should also make sure you have a mesh cover over your outlet to stop rodents or larger pieces of trash.
Then make sure your power source is on and plug in your pump. Once connected, switch it on and watch the magic happen. Check for steady water flow and make any necessary adjustments with your new valves to ensure it cascades just right over each tier. It is also very important that enough water is in your bottom pooling area for the recycling, you do not want your pump to run out of water and fail.
Conclusion
Finish by stepping back and taking in the view and recall how to build handmade concrete waterfall came to be. Admire your handiwork and tweak any final details in the placement of your plants. Try and use plants with low water requirements, unless you managed to create deep areas of soil. Make sure everything looks natural and harmonious. The sound of flowing water, combined with the sight of your newly built waterfall, will transform your garden into a tranquil oasis.
Thanks for the Great Simple Steps on how Handmade Concrete Waterfall. If I ever get to that backyard project this would be perfect for the corner of my yard. Any chance you have a checklist of materials?
Like this:
### Materials Checklist:
1. **Concrete Mix**: – Choose a quick-setting concrete mix suitable for outdoor projects.
2. **Mold Material**: – plywood or melamine board (to create the shape of the waterfall) – silicone or plastic sheeting (for smooth surfaces)
3. **Reinforcement**: – rebar or wire mesh (to add strength to your structure)4. **Water Pump**: – submersible pump capable of circulating water efficiently.
5. **Tubing and Fittings**: – PVC pipe and connectors to direct water flow from the pump.
6. **Gravel and Rocks**: – natural stones, rocks, or pebbles for aesthetics around the waterfall area.7. **Sealant**: – waterproof sealant (to protect against weather elements).
8. **Tools Needed**: – shovel – trowel – level – mixing bucket/drill mixer – saw (for cutting mold material) – measuring tape
9. **Safety Gear**: – gloves – goggles/mask
10. **Landscaping Supplies (optional)**: Depending on how you want to finish off the area surrounding your waterfall, consider mulch, plants, or decorative stone.
Feel free to adjust this list based on specific design ideas you have in
Hi Chris,
No, this list is too far off, as I edit the post I will add the list at the bottom.