Textured finish in the Architectural Precast Stone Industry
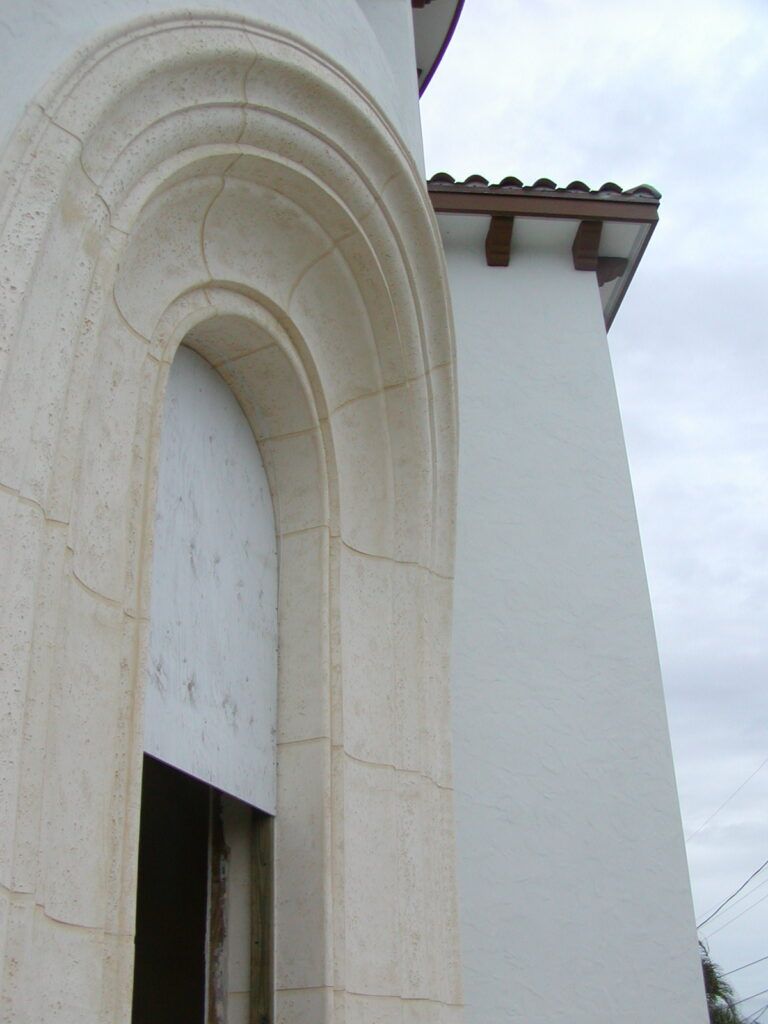
How to make interior stone wall texture. Today’s topic is a detailed look at a unique finish in the architectural precast stone industry: A textured finish created using baking soda. If you make thin veneers you can cover any interior wall with this product. and for difficult corners or shaped pieces, you can make them to fit.

There are many other ways to make similar interior stone wall texture finishes and I will cover some of those in future posts. If there is something in particular you are looking for, or you need ideas to suit a current situation, send me a message and I will get back to you ASAP. There are ways to use stucco, plaster and paint to create textured walls.
We’ll walk through the entire process and welcome any questions or comments you may have.
I/We promote transparency. This post or site may contain affiliate links. This means only if you make a purchase through these links, not just by clicking, I/we may earn a small commission at no extra cost to you.
As an Amazon Associate, I earn from qualifying purchases

Origin of the Technique Of Texturing
The origin of this technique is unclear, but I first encountered it in the early ’90s in South Florida. I met a posh-speaking British engineer, a regular at one of my English pubs. He visited weekly, and we often discussed work. He soon realized I had extensive construction knowledge, and the pub was just a sideline for me. I enjoyed the variety of people I met there.
He persistently asked me to work for him and his partner, and I eventually agreed to a small contract. I even brought along another customer as a laborer. He stayed working for many years and is still involved in the cast stone industry to this day. The job involved installing precast stone on a high-end new house in Ft. Lauderdale.

Upon arrival, I found pallets of cast stone wrapped in cling wrap, with no real paperwork, just a plan with highlighted areas. It was a disorganized mess, but I figured it out and made adjustments on-site with the client’s approval. This approach allowed us to move forward quickly, and I earned a significant amount $’s for that time. My past experience in laying bricks and tiles made me one of the fastest installers around.
Amongst all of this material, there was an awful lot for interior stone wall texture, to a fireplace, a kitchen hood and a feature dining room wall. There were also some for several exterior areas of the house. With this amount of veneer work on one house, it was a very fast baptism into the world of interior stone wall texture. And the cast stone industry as a whole.
The other issues that I encountered and had to deal with on this first job ranged from minor to horrific. incorrect stone pieces, missing pieces, broken pieces and an awful lot of bad-quality stone. Much of this was actually thrown into a dumpster and carted away. So I learnt so much from just one small job about the industry as a whole. It fascinated me, especially as I was still relatively young, especially by today’s standards of age.
Learning the Wet Cast Method For Interior Stone Wall Texture
This is how I learned about the wet cast method for interior stone wall texture. I used to visit the yard up north and watch the Mexican workforce create the wet cast stone. The process works on any mold surface, provided you have the right release agent. This can be rubber, wood, concrete, plastic, silicone, or plaster.
- Release Agent: Needs to form a stronger film layer than conventional ones.
- Biodegradable Version: Made using solid cooking lard and liquid shortening, mixed to form a usable paste.
- Temperature Variations: Ratios vary with temperature; the hotter it is, the more lard you need.
- Application: Brush the grease mix onto all mold surfaces and any parts you want to keep clean when pouring the pieces.
- Porous Molds: May need one or two extra coats as the mold absorbs the grease.
Preparing the Baking Soda Mix
But first, you have to make the baking soda mix. Combine baking soda and clean water. It’s easier with a mixing drill and paddle, but you can do it by hand.
- Mixing Ingredients: Combine baking soda and clean water.
- Mixing Tools: Easier with a mixing drill and paddle, but can be done by hand.
- Consistency: Mix until very lumpy, then let it sit for a while.
- Adjusting Wetness: If too wet, add more soda until it resembles a very dry concrete mix.
- Drying Out: Sometimes spread on a clean flat surface in the sun to dry out a bit, creating harder, more irregular lumps.
- Optional Step: This drying step isn’t necessary after a few tries at mixing.

Texturing the Molds
Once your molds are greased and ready, you can start texturing by hand. The learning curve is small, and almost anyone can do it.
- Throwing Baking Soda: Grab a handful of semi-dry baking soda, enough to close your hand around it but leave a gap around your thumb and forefinger area. Throw it at the mold with enough force to stick to the side areas, which you always do first.
- Covering Edges First: By doing the edges first, you’ll naturally cover parts of the main areas. Fill in any remaining areas that still need some baking soda.
- Complex Molds: For more complex molds like a Cothinian capital, it’s best to texture your rubber mold before reassembling it. Other molds may require you to tip out any excess baking soda.
Preparing for Pouring
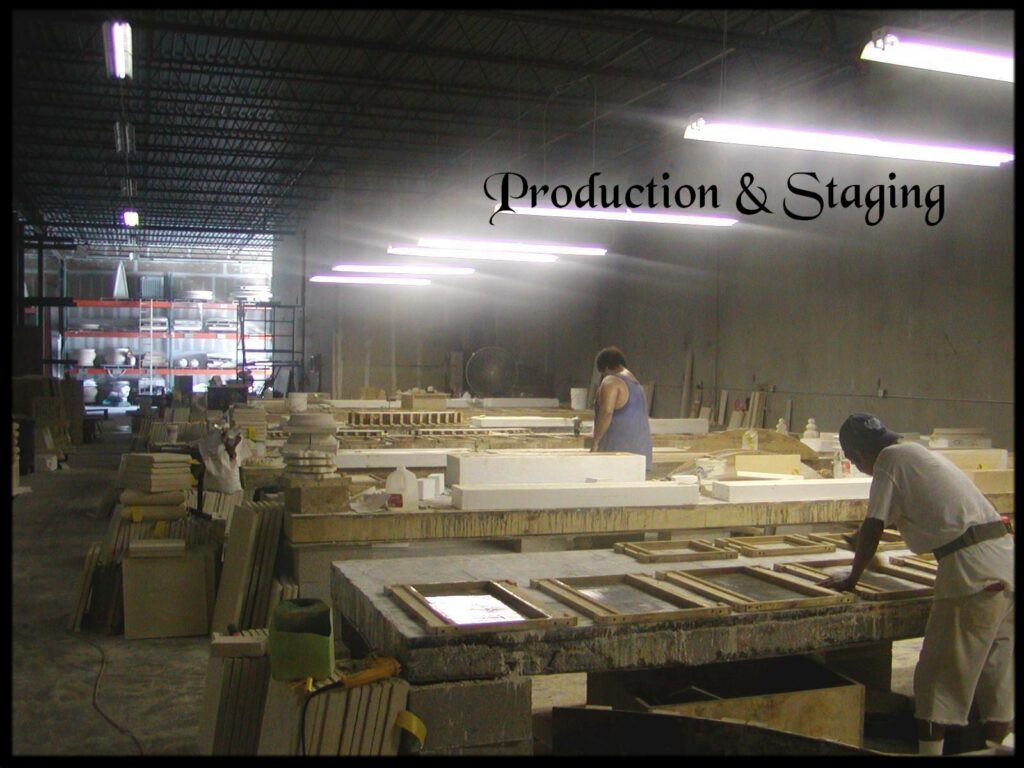
- Letting Molds Sit: Allow the molds to sit for a while. In mass production facilities, only certain people were allowed to do this and work ahead of the pour crew.
- Mixing and Pouring: Start with the lightest colored mixes first, working your way through to the darkest. This saves continual clean-out of the mixers. The mix is brought to the pour areas in wheelbarrows and scooped out using homemade scoops made from liquid laundry soap bottles.
- Placing the Mix: The mix is carefully placed into the mold, not just shovelled in. A stronger 4-1 mix with increased water content and a little chemicals to help with flow is used.
Removing Any Air and Finishing
- Tapping and Screeding: Tap the perimeters with mallets or gently tap one end of the mold on the surface below to remove most of the trapped air. Screed off the top surface (back of the finished piece), then trowel it. In most cases, a second troweling is done a little later.
- Demolding: After the mix has set, which doesn’t take long in South Florida’s normal humidity, demold the pieces. Most of the hardened baking soda will stay on the surface of the mold, but some may need a light spray of water to dissolve the remains.
- Cleaning Molds and Tables: Clean the molds and tables, and begin the process again. In peak production, overlapping shifts allowed for a 4th and 5th pour.
Thin Veneers
If You have now made many thin veneers you can now install these on virtually any straight wall and create your interior stone wall texture. As we have not gone through how to make any flat radius pieces yet. Once these veneers are dry you can install them, much like ceramic or porcelain tiles. With the same considerations for a suitable sub-base and setting materials, although sometimes it’s advisable to apply a little unsanded thin-set to the backs for an even stronger bond. There are many suitable adhesives in caulking tubes for cast stone too.
Just remember, although it’s not compulsory, to leave a 1/4″ grout joint, which can be filled as you go or with a grout gun or grout bag later. You will need some spacers to keep this even. Personally and with a little extra care, I preferred to grout as I installed, but that was the bricklayer in me.
Contact Us
We hope you find the information useful, but if you have any questions or need help, send us a message. You do have to sign in and confirm these days to comply with government rules. Sorry for the inconvenience.
Author Rob


Wow, what an incredible article! Your insights on using wet precast stone for interior textures are nothing short of inspiring. I couldn’t help but imagine how much character and elegance this technique could add to any living space. Have you tried incorporating this method into smaller, more intimate rooms like a study or home office? Also, what are your thoughts on pairing this texture with modern minimalist decor—would it create a stunning contrast or be too overpowering? I’m curious if you have any tips for DIY enthusiasts who want to tackle this project themselves. Thanks for sharing such valuable content!
Best regards,
Gabriel John
Hi And yes I have used in low-ceilinged rooms with wet bars or full bars, you just have to scale things down the smaller the space