
Silicone Mold Making Kit.
Today, we will talk about how to choose from silicone mold making Kits & supplies. At its core, silicone mold making is an art form, a technique used to reproduce objects with incredible accuracy. Making it crucial in a variety of industries from jewellery to cooking to automotive parts. However, this article will guide you through the process of using it in the cast stone industry, based on insights from a person who has extensive experience in their career. This article will concentrate on silicones Not RTV rubbers.
I/We promote transparency. This post or site may contain affiliate links. This means only if you make a purchase through these links, not just by clicking, I/we may earn a small commission at no extra cost to you.
“As an Amazon Associate, I earn from qualifying purchases,”
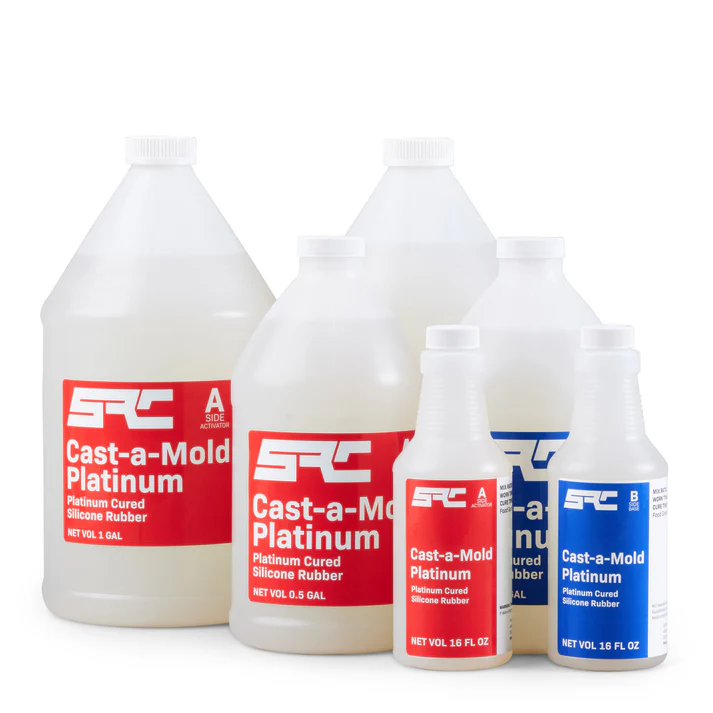
Types of Liquid Rubbers.
There are two main contenders in this space for replication: Liquid Silicone Rubber and Liquid RTV rubber. Both have their place in the world of replicas, but as we’ll explore, silicone often takes the crown for reasons that span from practicality to performance and variety.
Factors.
The choice to opt for silicone isn’t arbitrary; It’s reflective of the specific needs of a project. You need to consider the number of pieces you plan to produce. And if there will be other future orders for this piece. The intricacy of the original piece, and so the complexity of the new mold. And the chosen style of the finished piece that will ultimately be produced. These are the most important factors that play into the decision to choose one material over the other.
Properties.
What’s fascinating about silicone rubber is its unique properties. There are so many slight variations to choose from. This has built its reputation for being extremely flexible, durable, and resistant to extreme temperatures. Which can make a world of difference in your mold-making ventures. The latter benefit you are probably thinking doesn’t apply to wet cast stone production but I can assure you it does. If accelerators are used then the heat generated can be quite impressive.
Using silicone offers many opportunities for various applications, making it a smart choice for both beginners and seasoned professionals alike.
Choosing the Right Material for Your Mold
When you’re new to silicone mold making, the array of materials at your disposal can be a bit staggering. Many have no idea which 2-part liquid rubber or Silicone is best for their project or application. You might still be wondering why one would choose silicone rubber over other types of RTV rubbers. It boils down to several considerations that you need to weigh up before diving in.
In a large production run of the same piece, silicone rubber can be incredibly resilient. Often allowing for more casts, and faster and easier turnaround time between pours. And with just the minimum of care and maintenance, the mold will give you longevity before the mold starts to degrade. With far fewer pieces in a longer time span, you might opt for a less durable and more cost-effective RTV option.
Complexity & Silicone Mold Making.
The complexity of your design? Silicone rubber comes out miles ahead in this arena due to its flexibility, ability to replicate fine detail from the original. It can be easily taken apart as it “pulls” well when de-moulding, without ripping apart. This is absolutely crucial when you’re replicating objects with fine or complex features. But again, items with less detail might be better suited with an RTV rubber.
The intended end product also comes into play, if there is any potential for using the mold for different product lines in the future, which have different considerations while manufacturing. Does the method of production or the material used need to withstand even higher temperatures? Or certain chemicals or other silicone-to-silicone manufacturing? There will be a suitable variant in the silicone product range.
Why Silicone For Mold Making?
The specifics of what makes silicone rubber stand out. Its properties are quite impressive. Other features such as not always using a release agent as silicone maintains it’s own in its composition. You can feel a silky-like touch on the surface of the moulds. Another important point is that for beginners, especially it should be noted CS25 silicone, which is a condensation cure product, does not need degassing. This avoids additional costs of the equipment and another process as it is used. Degassing is more common in the RTV rubber range of products. And for many types of resins, especially casting resins, where a totally glass-like appearance is required. I will cover the degassing process in a future article.
Costing.
Comparing costs, silicone rubbers can be far more expensive than other liquid rubbers and as this is an upfront cost, it doesn’t fit all budgets. However, their durability often means you’ll get more use out of a single mold, and less labour costs in production and mold maintenance, which can offset the initial investment in the long run.
Where to Buy.
In This article I have provided links to more than one supplier or product. I have only included products I know of and have worked with. Currently, SRC offers sizes to accommodate DIY craft persons and professionals and their companies.
They have a fast and efficient delivery service and fantastic customer service in place. There are the occasional mistakes as with any service, but they are far between. So I do highly recommend SRC for a company to provide you with Silicone and other products.
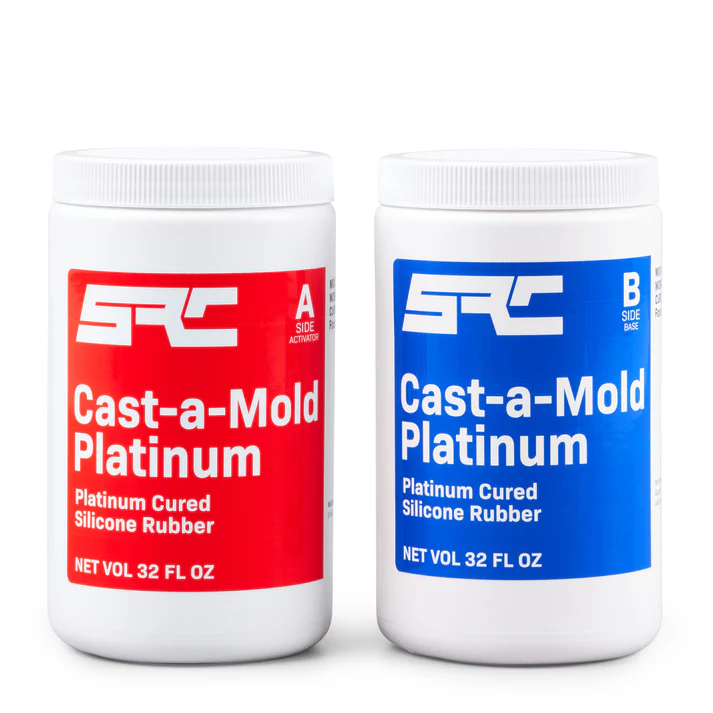
The prices for their food-grade platinum start at $41.99 for 32oz
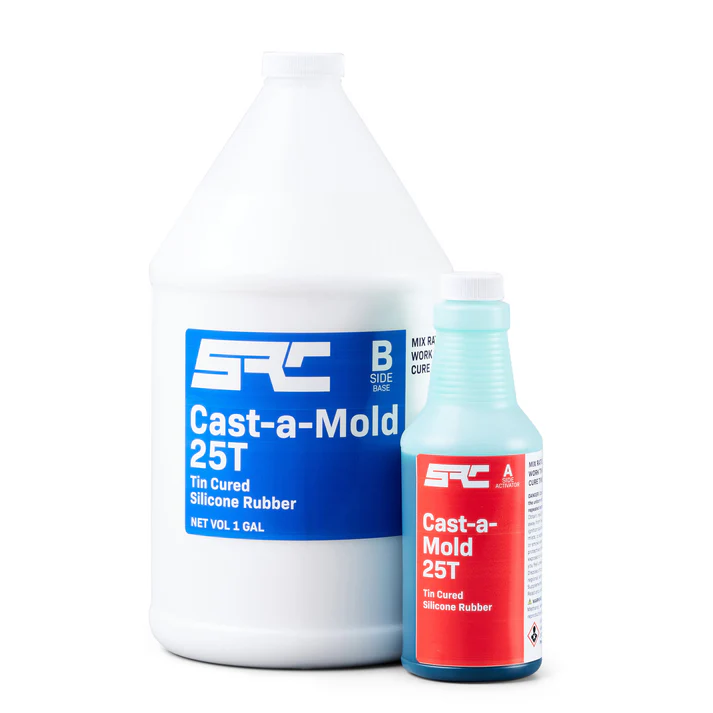
And their general purpose 25T start at $24.99 for a 16oz
And less 11% for as long as the deal is running.
Specialty Resin & Chemical is Your Trusted Partner for Top-Quality Products
Why Choose SRC?
- Quality & Affordability: T
- American-Made Excellence:
- Exceptional Customer Service:
- Fast & Reliable Delivery:
- Special Offer: Get an 11% discount when you visit their site today!
Storage.
Designing a spreadsheet for this cost evaluation is worthwhile. If you opt for silicone, remember to include the cost of storing the mold itself and any original models or prototypes made from or for it I used to have over 8,000 SQFT dedicated to mould storage. so it does mount up over time
All these factors combined portray silicone rubber as a very versatile product in the mold-making universe. Its ability to capture detail and endure repeated use without compromising the quality of the pieces it casts makes it a favourite among professionals and hobbyists alike.
Tools and Supplies: Getting Started with Silicone Mold Making.
Consider the essentials you need to begin your silicone mold making adventure. Budgets might be stretched, and you may not have exactly what is best suited to start with or a full kit, but you can add some things later. Especially if you adjust your approach after your first experience, your tool kit needs may be a little different
The core of any silicone mold making kit, is undoubtedly the silicone material itself. Yet, to bring your creation to life, there are a few tools and accessories you’ll need to gather so that the process goes a lot easier and runs smoother. With any product and application where you mix two parts together and time is limited, you must be prepared. But before you choose the tools, consider how big the pour will be
How Much Silicone?
How much of the silicone rubber itself do you really need? Work out the quantity for your current silicone mold making project, and any on the horizon, because it is an expensive product, and you don’t want to over order, it does have a 6- 12 month shelve life before it starts to degrade, but most importantly you must have enough for the project in hand. Remember, the more you buy, the cheaper the product. However, it’s no good if it sits there unused and steadily goes off
Methods For Silicone Mold Making By Volume.
Depending on what type of mold you intend to pour the computations to work to the volume of product can be a task unto itself. I could go into masses of formulas and cheat sheet methods, but basic common sense and a few measurements will be ample for most projects. If not and your mold is particularly irregular in shape, filling your mold with water using a big measuring jug will give you the volume. And test for leaks at the same time, because if water leaks, so will the expensive silicone. Yes, you might have some extra cleanup to do, or wait for it to dry. Or you could use another medium, like dry play sand etc.
Silicone Mold Making & Batching.
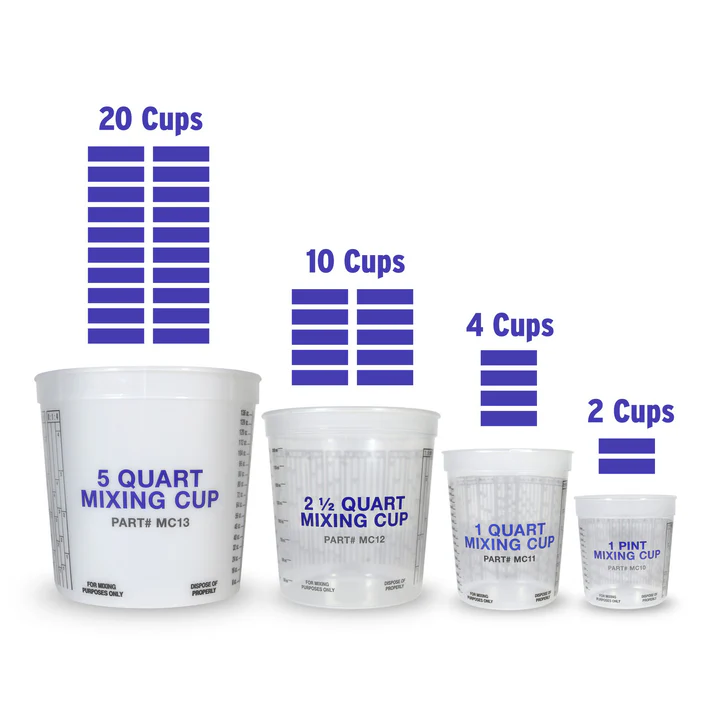
Next, you will need an accurate set of scales, with a range big enough for the size of your mix, and a good stock of 5-gallon very clean paint buckets, that are used for mixing in. But a stock of smaller containers is advised for smaller projects or where you want or need to mix smaller batches.
Please remember silicone rubber and most other 2-part products are mixed by weight ratios not volume! Release agents like a mold release wax to coat the insides of all your mixing buckets, mixing tools and working surfaces. This makes clean-up much easier as it prevents sticking to these and other items including the outer mold frame or shell. For coating your prototype and shell mold a spray or paintable release agent will be needed, suitable for your silicone. A mixing drill and a couple of whisks suitable for the mixing drill and the size of your mixing buckets are a must. For smaller batches, you may have to switch to a smaller drill, but definitely a smaller whisk or paddle.
Silicone Mold Making & The Mixing.
Mixing takes a little care, weighing is important for most even the ones that say by volume.
Weigh out A & B products in separate containers, 1 being big enough for the 2 when combined, with additional space. The way you mix is important too the right whisk helps to pull your mixture from the sides, and helps to NOT put air into your mix. You need to mix at a slowish speed, occasionally stopping to scrape the sides, mix until thoroughly mixed and even in color. Some silicones to not need degassing for others it’s recommended. Temperature and age of the product also play a part, I advise using the 73-25 by Polytek for at least your first few pours, it is easier to work with.
Silicone Mold Making & Pouring.
Pour the silicone into your mold slowly, be considerate to intricate details. If needed, stop and slightly tilt the mold and base side to side to help move any air bubbles that may be trapped against the sides of the model.
Timing & Silicone Mold Making.
Timing is important for mixing, working and setting or curing. Mixing and pouring are in the same time frame, as are your setting and curing, but please pay heed to them both, partially the mixing and pouring time window. You can buy accelerators or retarders. Retarders can triple or more your working time and are added to part A of the mix. Accelerators can take your time down to 1/6th of your original. They go into part B. Each product by different manufacturers can vary a little. So do your homework, please.
How to Prevent Leaking With Silicone Mold Making.
Use caulk to seal and stick your model to the baseboard, preventing rubber leakage under your model. You can also apply it to any framework, holes in the shell mold, or joints around your model. If you don’t seal the tiniest of holes you will get leakage.
This product will find the tiniest hole. Just when you thought it was a job done, you see a puddle of silicone on the floor. It’s happened to me. It’s not just the frustration, it’s the loss of a very expensive product and the delays. Spend a little more time checking for possible leakage spots and I recommend having a block of modelling clay to hand to dam up anything you might have missed. So now you are ready to mix, but let’s cover a few more points that may need your attention.
Which Release Agent To Use With Silicone Mold Making.
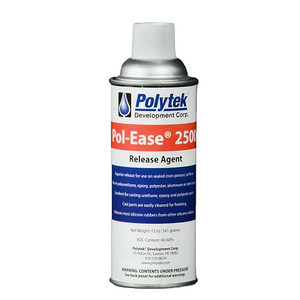
Clean and seal the model or prototype if it is made of a porous material, then coat it with the appropriate release agent like Pol-ease 2500. Also, coat the shell or surrounding framework, possibly with a different product. If you are using a framework-style outer mold, ensure it is set up nicely and level. Remember silicone will normally pick up and mark or defect in your silicone mold making when you pour.
An unlevel base to your mold, when the silicone is poured, will have a knock-on effect when you de-mold and turn the mold over for production. The pieces will then be made out of level. All of these items and tasks are important to the endeavour, ensuring your molds and production pieces come out without defects.
Safety.
I’ll also note that safety should be on your mind throughout this process. Items like disposable gloves are a must, goggles, and adequate ventilation for most products are non-negotiable. Making molds and the use of silicone rubber should be fulfilling, not harmful.
With your workspace prepared and safety gear at the ready, you’re set to transition seamlessly into the actual silicone mold making process. Take your time to familiarize yourself with the product MSD’s and any instructions; knowing them like the back of your hand may pay dividends later.
Casting a Successful Mold
This Silicone mold making adventure paints a clear picture of the final steps and considerations to ensure your project is a success. Once you’ve chosen the perfect silicone rubber for your project and have all the necessary tools at hand, follow the guidelines for the mixing and curing processes. Accuracy is at this stage is critical, as inaccurate measurements or inadequate mixing will lead to disappointing results.
The Silicone Mold Making Curing Process.
From there, pay close attention to the curing environment. Temperature, but not normally humidity can affect the curing time and the final properties of your mold, so you’ll want to keep conditions as stable as possible. Most silicones prefer a temperature of between 70-80 F (21 -27 C) outside of these ranges can still work but some, then all of the 4 points below could kick in.
Points For Curing.
- Slower cure. The curing time will be extended, lower longer!
- Increased viscosity. The mixed silicone product if it is thicker makes it more difficult to pour and it might not pick up all the finer details from the model.
- Air entrapment. Air entrapment (gassing) is rare when within the ranges. more air bubble affects the quality of the piece.
- Incomplete curing: Extremely low temperatures can prevent final curing resulting in a weaker or useless mould. So provide heat if you are in doubt.
Contacting the manufacturer or supplier is recommended for full details as the same type of products from different manufacturers can have different properties.
Care.
After the initial casting; it’s also about the long game. Maintenance of your silicone molds is straightforward. Clean them gently with soap and water, the occasional conditioning with a silicone spray, and store them away from direct sunlight and extreme temperatures to extend their lifespan.
Remember.
Keep in mind that the more complex the mold, the more practice and patience you’ll need. However, the versatility, durability, and quality finish provided by the silicone mold making process make it well worth the effort. Making a cast stone piece that requires this process and that impresses with your customer is very rewarding. After all, every master was once a beginner, and with silicone mold making, the opportunities for creativity are endless.
To Close
I hope that you’ve found this guide insightful and that it helps you embark on your journey with confidence. Whether it’s a commercial venture or a hobby.
We’d love to hear about your silicone mold making experiences and see what amazing projects you have created. Your feedback not only contributes to my knowledge it can be used in future articles or posts to help others. Please use the subscribe feature to get in touch after receiving your confirmation email, which is now becoming the standard for the government’s requirements. We are sorry for the inconvenience.
Watch out for a directory of suppliers and different products in a page format on the site. It will be in Meta format
Contact Us
We hope you find the information useful, but if you have any questions or need help, send us a message. You do have to sign in and confirm these days to comply with government rules. Sorry for the inconvenience.
Author Rob



Great article on using a silicone mold-making kit! Your step-by-step guide makes it look so approachable, even for a newbie like me. I’ve been thinking about trying my hand at making custom molds for some DIY projects at home. One thing I’m curious about—how do you ensure that the molds come out perfectly without any bubbles or imperfections? Any tips or tricks for getting a smooth, professional finish? Thanks for sharing your expertise!
Hi Steve,
Thanks for reading my post, and to answer your question, many of the products available today, have less chance of creating air pockets/bubbles in your finished mold. there are too many variables for me to answer you exactly, but I can explain how to narrow it down. What the product is made of and the release agent you use are the number one reason. second is how you mix your product, if you mix it to hard and with the wrong method air will be introduced into your mix, and temperature can play its part. and age of the product.
If any of these are in play the degassing may be your answer, which is a subject and not a quick answer.