Crafting Realistic Hollow Manmade Rocks for Waterfalls and Garden Features
Introduction
Hollow manmade rocks are a versatile and lightweight solution for enhancing your concrete waterfall or creating stunning standalone garden features. By combining professional mold-making techniques with customizable crafting options, you can achieve natural-lookingmanmade rocks that are both functional and visually appealing. This guide explores multiple methods, from pigment application to advanced casting techniques.
As an Amazon Associate, I earn from qualifying purchases.
This post contains affiliate links. If you make a purchase through these links, I may earn a commission at no extra cost to you.
Pulhamite Rock Formations
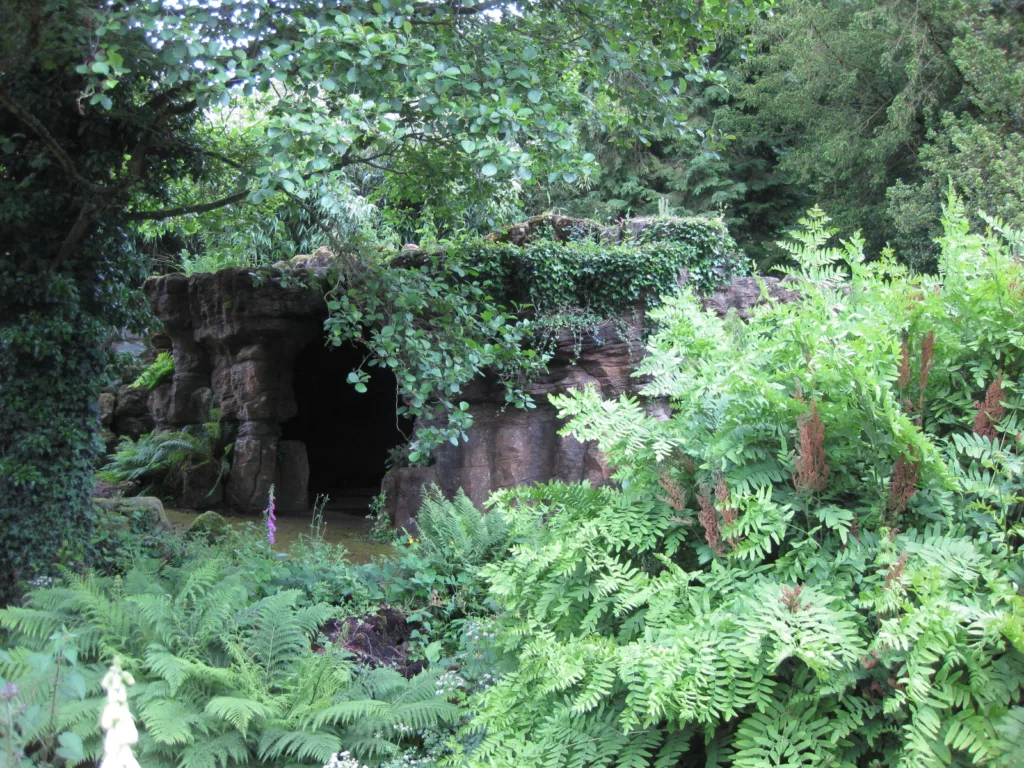
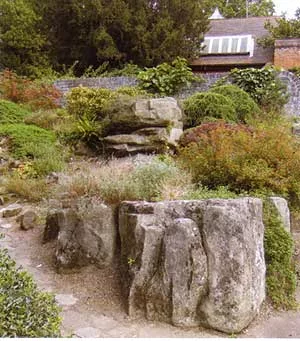
During the Victorian era the first of a real version of manmade rocks was invented. The creation of manmade rocks in formations, notably Pulhamite, played a significant role in the design of botanical gardens and ornamental landscapes. Developed by James Pulham and Son, Pulhamite was a proprietary blend crafted to mimic natural stone, enabling the construction of intricate rockeries, grottoes, and ferneries that were both aesthetically pleasing and functional. James Pulham lived from 1820 – 1898 and the composition of his branded product was an extremely closely guarded secret at the time.

Today with modern technology the analyses suggest a blend of sand Portland cement and clinker placed over a core of all sorts of rubble and crushed brick.
The process of creating these manmade rocks involved sculpting a mixture over a core of rubble and crushed bricks, allowing for the formation of hollow structures. This technique not only reduced the weight and cost of the installations but also facilitated the incorporation of planting pockets and niches ideal for housing exotic plant species, such as ferns and alpines, which were highly sought after during that period.
The versatility of Pulhamite manmade rocks allowed Victorian gardeners to emulate natural landscapes within urban settings, contributing to the era’s fascination with botanical diversity and garden artistry. These artificial rock constructions provided suitable microenvironments for a variety of plant species, enhancing the educational and recreational value of botanical gardens.
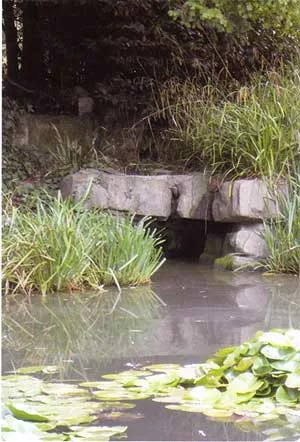
Today, many of these Pulhamite manmade rock structures still exist, serving as historical testaments to Victorian innovation in landscape architecture and horticulture. Their enduring presence in gardens and parks across the UK highlights the lasting impact of these artificial rock formations on garden design and their role in the popularization of botanical gardens during the 19th century. There are places like the rockery at Burslem Park, the Gardens at Coombe Wood Croydon, or the Waterfall at Battersea Park London. These are just some examples of that work.
Moving on to the more modern times and methods, most of which use some form of liquid rubber molds and silicone being the first choice.

The Foundation of Manmade Rocks: Molds and Frameworks
The first step in making manmade rocks is to choose a natural piece of stone to act as your model, not so much the color, but more the shape and texture.
Once you have made your selection(s) you need to give them a serious clean, test them with a pressure washer if you have one as it can be a lot quicker and easier. Once they are clean let them dry and pick your first one to make your mold of. Its best if you can position your now cleaning model at a good working height and levelled as best you can to suit your level base platform. Now it’s best to fill any deep gaps at the base and seal your rock to its base platform. This will stop your rubber from makeleaking under your rock model and making it easier for demolding later.
Depending on how big and complicated the shape of your manmade rocks are you may have to create splits in your shell mold that keeps all your rubber in place. Now is the time to plan where these need to be to suit the difficult undercut areas of your rock and allow for easy disassembly. It may only require one of these, but its best to think carefully about this option.
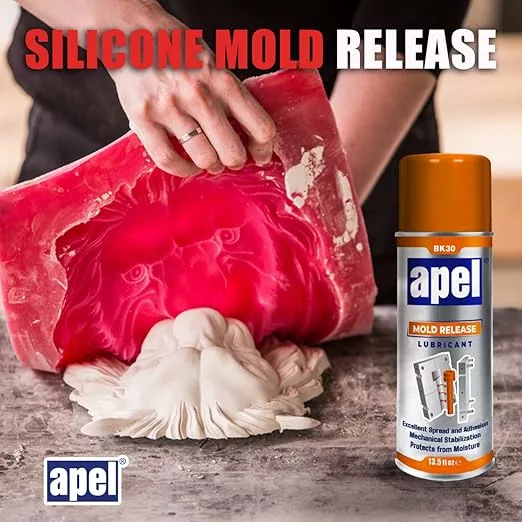
Depending on the type of rock you might need to apply one or two coats of sealer first and then a release agent. Now its time to choose your type of rubber, it is advisable to choose a brush on-product or one that you can add a thickener to. Using RTV urethane or a silicone rubber is ok, but silicone is by far the best if the budget can stretch that far. On projects like this, I would not recommend latex rubber as there is a lot of work going into projects like this, especially if you are working on a larger rock.
Creating Rubber Molds For Manmade Rocks:
Whether you are using RTV urethane or Silicone rubber for your molds of manmade rocks, please remember that silicones are ideal for replicating the finer textures of natural rocks. Either allows flexibility for easy demolding while preserving the details. The principal is to cover the whole rock model with a brush on the rubber product, including a flange area down onto your base platform. This may take at least 2-4 coats depending on the rubber, and always add a little extra where the more detailed or undercut areas are. When you think you are finished just double-check and add to any suspect areas. Now it’s time to move on to the outer shell mold.
Manmade Rocks and the Outer Shell Mold:
For this task, there are 2 main contenders, fiberglass and or a rigid 2-part plastic, but casting plaster, epoxy resins or expanding foams are others used with some fiber reinforcing. Before using any of these it’s time to build and form a temporary wall where you are going to create the mold splits. Modelling clay is great for this job. Build in some high spots or recesses into these to act as locating lugs for the different section(s). Make sure these walls are tight against your rubber to stop any leaks of the shell mold material. Apply a liberal coat of a release agent over your rubber and base flange and the wall for the split. Now apply your material of choice to your first section and allow it all to dry at least overnight.
Next day trim around the edges of your shell mold where the split wall is, then remove your clay and clean up the edges, coat your next section with the release agent and to the flange of your last part. It doesn’t hurt to add a layer of petroleum jelly to the wall areas as an extra precaution. If you intend on having more than one split, follow the same process until all sections are complete.
Framework and hardware for Stability:
Before you disassemble all the pieces it is best to drill any holes if you intend to use bolts to hold your sections together. Bolts also help with the alignment of the separate parts. You might choose to use strong clamps, either way works but bolts are less likely to get in the way when pouring. Nex a sturdy framework is essential to keep the mold level and stable while pouring and turning the mold over for demolding. Without proper support, uneven curing, material spills or serious damage can compromise the final product or mold.
Applying Pigments to Color Your Manmade Rocks
Before casting, pigments are applied to the inside of the silicone mold to mimic the natural variations in rock color. There are two common techniques:
Dusting Bags:
Please note that not all powdered pigment manufacturers recommend using their product for this method, so check first. Use dusting bags filled with pre-tested color formulas to evenly distribute pigments across the mold surface. This method creates subtle, natural variations, but works better if a release agent is also applied allowing the dusting to stick to it.
Pigment Slurries:
Mix pigments into a slurry and brush or pour it onto the mold surface. Wiping it over then with a rag is one way to blend in the different colors This allows for a more natural look and better control over the color placement.
Combination Coloring:
I have used this method a few times with great effect, work and wipe your slurry mixes into the mold, then dust over in some or all areas, what can happen is the thinner areas of color from the slurries allow the powders to break through, forming unique color patterns.
Just remember, please to practice on a smooth plastic surface and create your own colors and methodology for this phase.
Manmade Rocks Casting Methods: Choosing Your Approach
There are several ways to cast hollow manmade rocks, each offering distinct advantages depending on the desired look and application. Whatever method you settle on always use a 4-1 mix(s) and use polypropylene fibers
Dry Tamp Mix (Hand-Packed):
A semi-dry concrete mix is hand-packed into the mold. This method allows for controlled layering and a rustic appearance. It’s excellent for mimicking rough textures. And you can use different colored mixes with some success.
Wet Cast with Removable Core Molds:
For a more polished finish and natural color integration, a removable core mold can be used. Wet cast concrete is poured around the core, creating a hollow structure once the core is removed. Using different colored mixes with this method gives a far better effect based on my experience.
Manmade Rocks Using Polystyrene Cores:
Alternatively, polystyrene cores can be placed inside the mold and left in the finished product. This approach simplifies the process and reduces the amount of concrete needed and helps to strengthen the fished product and drastically reduce the weight. These cores can be made up of offcuts of foam, helping with waste control.

Finishing Touches
After demolding, the hollow rocks can be further customized to achieve the desired appearance by touching-Up coloring, or adding highlights or shadows with additional pigments or stains to enhance the realism.
Sealing is not strictly necessary, but applying a weatherproof sealant to protect the rocks from environmental wear and tear and it also helps preserve the colors.
Enhancing Your Waterfall or Garden Features
Hollow manmade rocks are not just decorative—they’re functional. Here’s how you can use them:
For Waterfalls you can use them to hide seams, cover up pump systems, or speakers or add layers to your waterfall design. Standalone Features by arrange them in your garden to create a natural landscape, incorporating plants or moss for an organic touch. People have actually built follies or grottos from this type of product and very effective they look.
Conclusion:
By combining innovative techniques and versatile materials, crafting hollow manmade rocks becomes an accessible way to elevate your outdoor spaces. Whether you’re enhancing a concrete waterfall or creating a garden masterpiece, these lightweight, realistic rocks bring your vision to life
Contact Us
We hope you find the information useful, but if you have any questions or need help, send us a message. You do have to sign in and confirm these days to comply with government rules. Sorry for the inconvenience.
Author Rob


Wow. I am impressed with the innovation and usefulness of this technology.
As I craft the outdoor spaces around my home, these Innovative techniques and versatile materials give me more ideas about how to accomplish my goals. Crafting hollow artificial rocks becomes an accessible way to elevate my outdoor spaces. I love the practical ways you have brought out in this article of making my landscaping dreams come true.
Hi Iris,
And thank you for your comments. Rocks, although they can be big, are an easy project than most, as you can always recoat or color the outsides.
Let me know if you make any.
Robby