
 By Robby
How to Choose Your First Candle Mold Project: Start Simple, Stay Safe.
Introduction
If you’re thinking about making your first molded candle, the first decision isn’t what wax to buy or how to pour it.
It’s what you actually want to make and how complicated you want your first project to be.
You have two sensible choices.
You can buy a ready-made silicone candle mold and concentrate mainly on making the candle, or you can choose a simple existing object and make your own silicone mold from it.
For your first project, I wouldn’t go any further than that.
You can certainly create and sculpt your own original models, make complicated split molds and move into much more advanced mold-making techniques later. But there’s little point trying to learn everything on your first attempt.
The objective here is to successfully produce your first molded candle and understand what happened along the way.
I’ve bought several silicone candle molds online myself, and so far every one has needed some form of attention before I considered it ready to use.
So buying a candle mold doesn’t necessarily mean taking it out of the package, filling it with wax and hoping for the best.
For those of you who already have experience with a 3D printer, creating a simple candle model following the basic design principles in this guide can also be a perfect project.
Whether you buy your first mold or make a simple one yourself, we’ll look at the things that actually matter to producing the candle.
After more than 30 years working with molds and molded products, one thing I still do before starting any new project is take a good look at the piece and think through the complete process before I start.
With a candle mold, that means thinking all the way through to lighting the finished candle.
Step 1: Decide Whether to Buy a Candle Mold or Make One
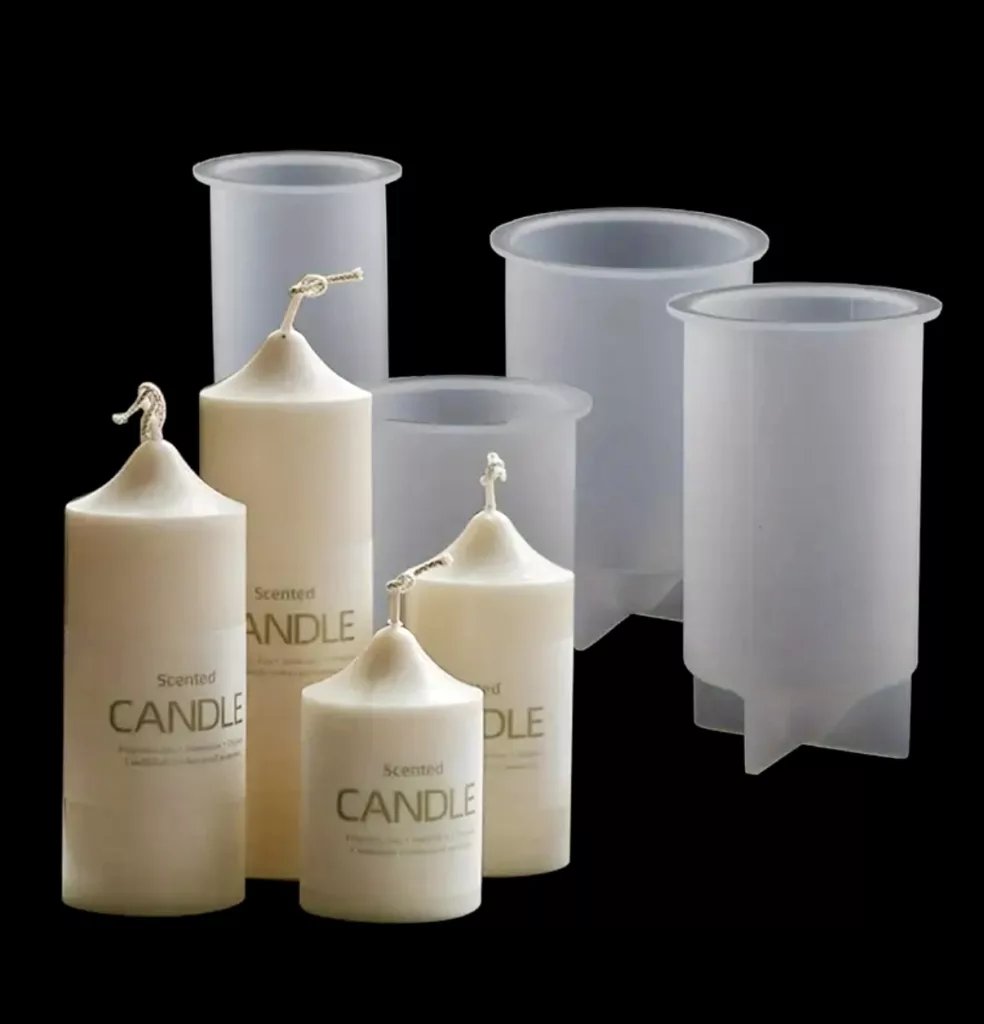
If your main interest is learning candle making, buying your first silicone mold is the simplest route.
There are thousands available in different sizes and designs, and a simple ready-made candle mold can remove a huge stage from your first project. You might still have some work to do before you can use it, but the model and at least the basic mold-making stages have already been completed.
If you’re also interested in learning mold making, making your own simple silicone candle mold gives you the opportunity to learn both skills.
Neither choice is wrong.
What matters is keeping your first project manageable.
If you’re buying a candle mold, choose a relatively simple design. Maybe choose something you can plan to give to a loved one afterwards. That can make completing your first project even more rewarding.
If you’re making one, start with an existing model that already has a suitable shape rather than trying to create an original model from scratch.
You can do that later.
For now, let’s concentrate on getting your first candle made.
Step 2: If You’re Buying a Candle Mold, Look at the Candle First
It’s very easy to choose a candle mold because the photograph of the finished candle looks impressive.
Before buying it, look beyond the photograph.
Ask yourself what that shape will actually be like as a candle and, importantly, how safe it will be when you eventually light and use it.
For a first project, I would look for:
- A reasonably simple shape
- A stable base
- A design that can stand safely
- No extreme projections
- No very thin sections
- A shape that looks as though it can be removed from flexible silicone without being damaged
- A sensible route for the wick through the candle
Personally and practically, I wouldn’t choose a first candle mold with long arms, branches or other features projecting a considerable distance from its main body.
Some designs can be technically possible to mold and produce but still make poor candles. With complicated projections, you can also expect a higher number of damaged products during demolding.
Think about what happens as the candle burns down.
What happens to those projections as the main body of the candle gets smaller?
Your first candle doesn’t have to be boring, but its design should make sense as something that’s eventually going to have a flame burning on top of it.
A straightforward pillar or gently shaped decorative candle mold is a much better place to start.
Step 3: Don’t Assume a Bought Candle Mold Is Ready to Use
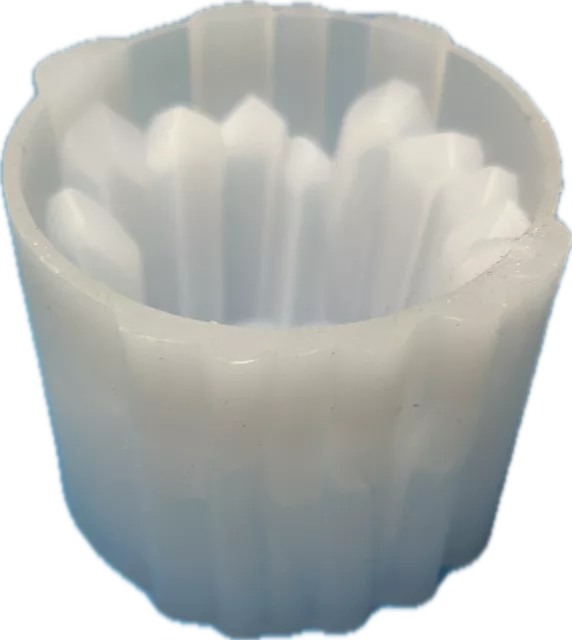
When your candle mold arrives, inspect it before putting wax anywhere near it.
As I mentioned earlier, I’ve bought several candle molds online and so far they have all needed some form of attention before I considered them properly usable.
Look at the complete candle mold rather than just the detail on the inside.
Check:
- Does it stand upright properly?
- Does it need external support?
- Is the pouring opening practical?
- Is there provision for the wick?
- If there is a wick position, is it actually where you want it?
- Are there thin or weak areas in the silicone?
- Are there seams, flashing or pieces of silicone that need cleaning up?
- Has the mold become distorted during manufacture, storage or shipping?
- Can you realistically see how the finished candle is going to come out?
Put the empty candle mold in the position in which it will be filled and ask yourself: will this work, and is it safe enough to fill with very hot liquid wax?
What I normally do is set the candle mold up correctly, fix or support whatever needs attention, and then make a test casting using molding plaster or a similar material before I commit to wax.
This can reveal potential problems with the candle mold, including whether the finished piece can actually be demolded without damage.
Remember, plaster is harder than wax. If you can’t remove a plaster casting in one piece without damaging it, a wax candle is likely to have even less chance.
Now imagine the candle mold full of hot liquid wax. Will it stay upright and retain its correct shape while the wax sets?
Flexible silicone that appears perfectly adequate while empty can change shape under the weight of the wax.
If the candle mold needs support, deal with that before you start melting wax.
This simple inspection and test can prevent wasting wax and, more importantly, avoids discovering a problem while you’re handling hot material.
If you’ve bought your candle mold and you’re satisfied with it, you can move ahead to Step 11, where we prepare the mold and wick.
If you want to make your own simple silicone mold, continue with the next step.
Step 4: Choosing a Model for Your Own Candle Mold
The model is the original object from which you’re going to make your silicone candle mold.
For a first attempt, keep this very simple.
An existing pillar candle is an obvious choice. You could also use another smooth, uncomplicated object with a shape suitable for becoming a candle.
At this stage, I wouldn’t recommend making your own original model unless you’re already competent with something such as 3D printing.
Otherwise, creating the model introduces another complete skill before you’ve even started making the mold.
There is plenty of time for sculpting, carving and creating original designs once you’ve successfully made a few candles and understand how the complete process works.
Whatever model you choose, remember one important rule:
Every scratch, dent, joint and surface texture on the model can be reproduced by the silicone.
If you don’t want something appearing on every candle you make, correct it on the model before making the mold.
Silicone is very good at reproducing even the tiniest detail. It doesn’t know the difference between detail you deliberately created and a scratch you forgot about.
Step 5: Look at the Shape as a Candle, Not Just as a Model
Before making the mold, take another look at your chosen object.
For a first project, look for:
- A reasonably flat base
- Relatively smooth sides
- No severe undercuts
- No thin projections
- No deep areas likely to trap air
- A shape that can be removed reasonably easily from flexible silicone
Then ask yourself two questions.
How am I going to get the original model out of the silicone?
And once I’ve filled that silicone with wax, how am I going to get the candle out?
If neither answer is obvious, choose a simpler model.
There are mold-making techniques for dealing with complicated undercuts, difficult shapes and models that physically lock themselves into a mold, but they aren’t necessary for this first project.
The simplest solution is often not learning a more complicated mold-making technique.
It’s choosing a better first model.
Step 6: Turn the Candle Upside Down in Your Mind
This is one of the important differences when you’re thinking about a candle mold.
A freestanding candle will normally be poured through what eventually becomes its base.
So while you’re making the candle mold, you need to stop looking at the model simply as it normally stands.
Think about the finished candle.
Where will its base be?
Where will the top and wick be?
Where will you pour the wax?
How will the original model come out?
How will the finished candle come back out?
And will it stand properly when you turn it the right way up?
Most times, the best orientation for making the mold isn’t the way you would naturally place the original object on a table.
Work through the complete sequence before you build anything.
Step 7: Think About the Wick Before Making the Candle Mold
The wick ultimately needs to run through the candle and emerge at its top.
You don’t need to install the wick while making the silicone mold, but you should know how you’re going to position it later.
Depending on the candle mold, the wick can be positioned through an opening designed into the mold or threaded through the silicone afterwards with a wick needle or similar tool.
For your first project, a reasonably symmetrical candle makes this much easier.
Think about where the centre of the candle will be and where the wick needs to emerge.
The important point is simply to make this decision now rather than finishing the mold and then wondering how you’re going to get a wick through it.
Step 8: Prepare the Model
Once you’re satisfied with the model and its orientation, it needs to be prepared for molding.
It should be clean, stable and properly sealed if the material is porous.
Materials such as wood, plaster and some clays may need sealing before silicone is poured against them. Different model materials can also react differently with particular mold-making silicones.
Any unwanted scratches, dents, cracks or surface marks should be dealt with now.
This is where we stop and use the dedicated mold-making information on this site.
[INTERNAL LINK: Model preparation / How to Make a Silicone Mold]Model preparation, sealers, release agents and material compatibility are subjects in their own right, and there’s little value in repeating those instructions inside a candle article.
The important candle-specific point is that the surface you prepare now is going to become the surface of your finished candles.
Admittedly, there are techniques for improving the surface of a finished candle, but ask yourself whether you really want to introduce that additional process every time you make one.
It’s much better to get the model right first.
Step 9: Decide How Simple Your Silicone Mold Can Be
For your first candle mold, simple is still the objective.
A straightforward one-piece silicone mold around a simple model is ideal.
You need enough silicone around the model for the mold to retain its shape when you’re pouring wax, but that doesn’t mean filling a huge square box with expensive silicone.
Keep the mold reasonably close to the shape of the model and avoid large areas of rubber that serve no useful purpose.
You can also design the original mold box so that it can be reused to support the silicone when you’re making candles.
After the silicone has cured, remove it from the box and take out the original model. When you’re ready to pour wax, put the silicone mold back into its box for support and to keep it in its proper shape.
This is particularly important with candle molds because the weight of the liquid wax can distort an unsupported flexible silicone mold. An uneven or unlevel candle base may be the least of your problems.
There are more economical ways of making larger molds.
One is what’s normally called a blanket mold.
The easiest way to picture this is to imagine a tight-fitting nitrile glove.
Instead of having a thick block of silicone around the model, a relatively thin layer follows its contours, rather like the glove follows your hand.
The silicone reproduces the detail but isn’t rigid enough to hold the correct shape by itself, so it needs a hard outer support shell, often called a mother mold.
That’s a very useful mold-making method and can save a considerable amount of silicone.
But if your first candle requires you to learn how to make a complicated blanket mold and multi-piece support shell before you can make it, my advice is simple:
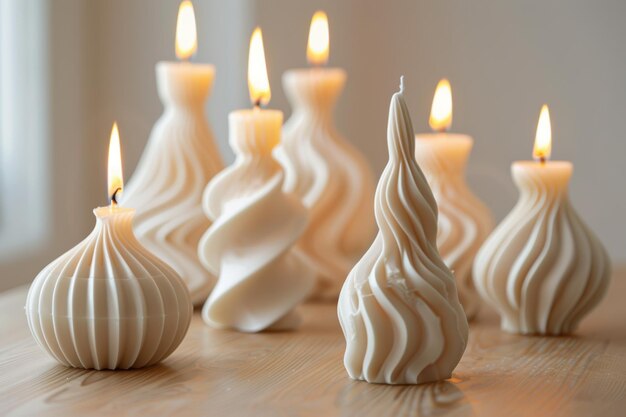
Choose an easier first candle.
[INTERNAL LINK: Shell and Mother molds]We’ll cover those techniques separately.
Step 10: Make Your Silicone Mold
Once you’ve chosen the model, orientation and basic mold construction, you’re ready to make the silicone candle mold.
This is another point where we don’t need to repeat an entire subject.
Choosing the correct silicone, building a leak-proof mold box, calculating the amount required, mixing, pouring, removing air, curing and demolding are all covered in our dedicated silicone mold-making guides.
I/We promote transparency. This post or site may contain affiliate links. This means that if you make a purchase through these links, not just by clicking, I/we may earn a small commission at no extra cost to you.
There are, however, a few points particularly relevant to candle molds.
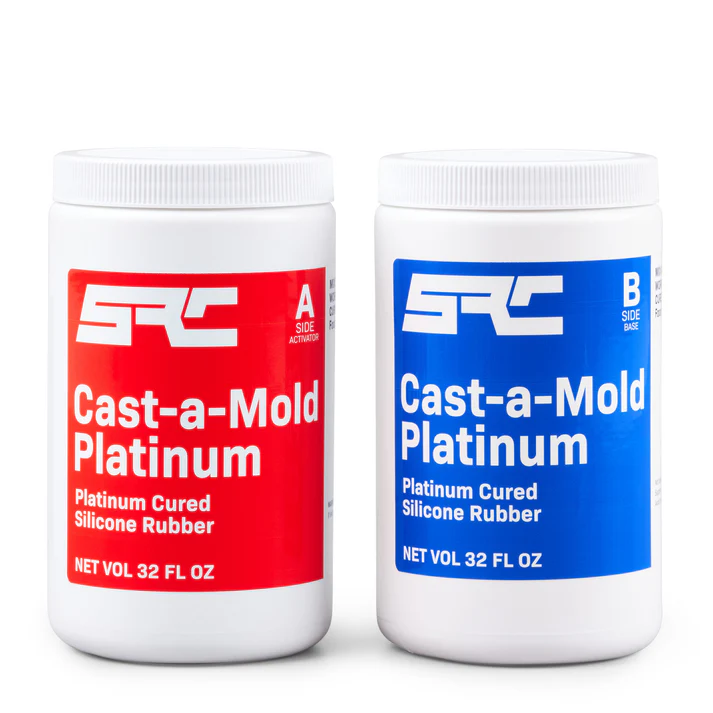
Choose a silicone suitable for the temperatures it will encounter with the wax you’re using.
For an example of the type of technical information you should check before choosing a silicone, you can view the manufacturer’s specifications here. this is the reatil/craft outlet for Polytek the company I have used so many times, Polytek’s technical bulletin for its PlatSil range is a useful example of the information you should check when choosing a silicone the following link takes you to it.
Link “manufacturer’s specifications” to the Polytek/SRC technical data.
Where practical on a simple mold, around 3/8 inch or 10 mm of silicone can be a useful minimum starting point, but the exact thickness will depend on the size and shape of the model, the silicone hardness and whether the mold has external support.
A softer, lower-Shore silicone can make demolding easier, provided it still has enough support to retain the correct shape.
And if you’re going to reuse the mold box as support, design it so that the silicone mold can be removed and replaced easily without damaging it.
Follow the detailed mold-making instructions and the technical information supplied by the manufacturer of your silicone. Our internal link How to make a rubber mold at home, should be very useful for you at this stage,
For this candle project, remember the things we’ve already decided:
- Which end will become the base of the candle
- Where the wax will eventually be poured
- Where the wick will run
- How the silicone will be supported
- How the original model will come out
- How the finished candle will come out
Once the silicone has cured and you’ve removed your original model, inspect the candle mold carefully.
Check that the detail has reproduced properly and that there are no obvious air pockets, tears, thin areas or distortions that will affect the candle.
At this point, I normally make the first casting in plaster or resin rather than wax. This gives me a permanent new master model that I can store safely in case the original or silicone mold is ever damaged.
Once you’re satisfied with the mold, you’re ready to make the candle.
Step 11: Prepare the Candle Mold and Wick
If you bought a ready-made mold, this is where both routes come back together.
By now you should have either:
- A bought silicone mold that you’ve inspected and prepared, or
- A simple silicone mold you’ve made yourself
Make sure the candle mold is clean, dry, upright and properly supported.
If you’ve designed and used a reusable support box, put the silicone back into it.
Now position the wick.

The exact wick you need depends on the diameter of the candle, the wax and other factors, so wick selection is something we’ll deal with separately rather than pretending one wick suits every candle mold.
For this project, concentrate on getting it positioned correctly.
The wick should be held securely so that it remains where you want it while the wax is poured and cools.
There are some very simple wick-centering devices available, and many wick or candle-making kits include them. They can make this job considerably easier.
Step 12: Choose Your Wax
Different candle waxes behave differently.
For your first molded candle, choose a wax intended for pillar or molded candles.
Don’t assume that any wax sold for candle making is automatically suitable. Container waxes, for example, are designed to remain inside their containers, while a freestanding molded candle needs enough rigidity to support itself.
Different waxes have different melting temperatures, pouring temperatures, shrinkage characteristics and behaviour with colours and fragrances.
Follow the manufacturer’s instructions for the particular wax you’re using.
And don’t feel that your first candle needs fragrance, colour and every other possible addition.
There is a good argument for making the first one plain.
You’re testing the mold, wick position, wax and your pouring method. If something goes wrong, having fewer variables makes it much easier to understand what happened and correct it.
Step 13: Melt the Wax Safely
Prepare everything before you start heating the wax.
Your mold should already be supported and your wick should be positioned.
Use suitable equipment for melting candle wax and monitor its temperature with a thermometer.
Never heat candle wax directly over an open flame and never leave melting wax unattended.
Follow the wax manufacturer’s temperature recommendations rather than relying on a single temperature quoted online. Different waxes require different treatment.
If you’re adding fragrance or colour, follow the instructions for those products as well.
Once the wax is ready, you should be able to move directly to pouring without suddenly discovering that the candle mold or wick still needs attention.
Typical Candle Wax Pouring Temperatures
The following figures are useful only as a general guide:
| Wax | Typical Pouring Range |
|---|---|
| Paraffin pillar wax | Around 170–180°F / 77–82°C |
| Soy pillar wax | Around 160–175°F / 71–79°C |
| Beeswax | Around 155–160°F / 68–71°C |
| Plant-based pillar blends | Often around 160–180°F / 71–82°C |
These are starting points, not instructions for every wax.
Even two products described as soy pillar wax can have different recommended pouring temperatures. Always check the manufacturer’s instructions for the exact wax you’ve bought and use those figures in preference to a general table.
Room temperature, candle size and other ingredients can also affect the best pouring temperature, so expect some testing as you gain experience.
Step 14: Pour Your First Candle
Make sure the candle mold is upright and stable.
Check the wick one last time.
Then carefully pour the wax through the opening that will eventually become the base of the candle.
Pour steadily and under control.
As the wax cools, it may shrink. Depending on the type of wax and the size of the candle, you may see a depression forming around the wick or centre of the base.
You may need to reserve some wax for a second pour or top-up.
Follow the recommendations for the particular wax you’re using rather than assuming every wax behaves identically.
Then leave the candle long enough to cool and harden properly.
Trying to remove it too soon is an easy way of damaging both the candle and your opinion of candle making.
Step 15: Demold Your First Candle
Once the candle has cooled sufficiently, remove any external support from the silicone mold or take it out of its mold box.
Sometimes, after the wax has completely cooled to room temperature, I put the whole project into the refrigerator for a while before demolding.
Don’t read that and think, “Great idea,” and put a freshly poured mold straight into the refrigerator.
Cooling hot wax too rapidly can create its own problems. Let the candle cool naturally to room temperature first.
Then carefully flex the silicone away from the candle.
Don’t simply grab the candle and pull.
Work the silicone away gradually and let its flexibility help release the candle.
This is where choosing a straightforward design, using a silicone that’s flexible enough for the job and avoiding an unnecessarily thick mold really pays off.
Once it’s free, stand the candle upright and have a proper look at what you’ve made.
Don’t just decide whether it looks good or bad.
Look for what it can teach you.
- Did the surface reproduce properly?
- Are there air pockets or missing details?
- Is the wick where you intended it to be?
- Did the candle mold stay in shape when filled with wax?
- Is the base satisfactory?
- Did the candle mold release easily?
- Is there anything you would change before pouring the second one?
If something isn’t right, work backwards through the process.
Was the problem already present on the original model?
Did it happen when you made the silicone mold?
Did the mold distort when it was filled?
Or did the problem occur while the wax was being poured or cooled?
That’s how you begin to understand the process rather than simply follow instructions.
Common Beginner Questions
Should I Buy or Make My First Candle Mold?
If your main interest is candle making, I would buy a simple silicone mold and learn how the wax, wick and mold behave together.
If you specifically want to learn mold making as well, choose a simple existing model and make the silicone mold yourself.
Both routes eventually bring you to the same place.
Does a New Bought Candle Mold Need Preparing?
In my experience, more than possibly.
Inspect it rather than assuming it’s ready to use.
Check its shape, stability, wick arrangement, pouring opening and whether it needs external support or a mold box.
My own experience with bought candle molds is that every one I’ve purchased so far has needed some attention before I was happy to use it.
Can I Use an Existing Candle as My Model?
Yes.
A simple pillar candle can make an excellent first model because you already know the shape works as a candle. You can also add simple embellishments fairly easily if you want to make the design your own.
Just remember that wax is relatively soft. Any scratches, dents or other damage to the original can be reproduced by the silicone.
Should I Make My Own Original Model?
Eventually, certainly.
For your first project, I wouldn’t, unless you already have the necessary skills, such as experience with 3D modelling and printing.
Making the original model introduces another skill and another group of things that can go wrong.
Get a successful candle or two under your belt first.
Do I Need Mold Release?
Not necessarily.
It depends on the model material, its surface and the silicone you’re using.
Check the manufacturer’s technical information and our dedicated mold-making guides before applying something simply because it’s labelled “mold release.”
Do I Need a Vacuum Chamber?
Not necessarily.
Some modern low-viscosity silicones can produce very good molds without vacuum degassing when they’re mixed and poured correctly.
Other silicones and more detailed molds can benefit from degassing.
Again, this belongs in the detailed silicone mold-making guide rather than becoming another subject inside your first candle project.
Can I Use My Silicone Mold for Other Materials?
Possibly.
Depending on the silicone, the same candle mold may be suitable for materials such as soap, resin, plaster or cast stone.
Check the manufacturer’s specifications before changing casting materials.
What Should Your Second Candle Project Be?
Once you’ve successfully produced your first candle, you’ve already learned quite a lot.
You’ve seen how a flexible mold behaves when filled with wax, how important support can be, how the wick is positioned, how the wax cools and shrinks, and how the finished candle releases.
Your second project can introduce something new.
Perhaps a little more detail.
Perhaps a larger candle.
Perhaps making your own simple silicone mold if you bought the first one.
Or, if you’ve already made a simple mold successfully, you can start looking at more interesting mold construction methods.
I would introduce one new challenge at a time.
Even after decades of making molds, I still want to know what changed between one project and the next. If something goes wrong, that gives you a much better chance of understanding why.
Wrap-Up: Your First Candle Is the Objective
Your first candle project doesn’t need to teach you every aspect of candle making and mold making.
It needs to work.
Choose a straightforward candle design and decide whether you want to buy the mold or make a simple one yourself.
If you buy one, inspect it and don’t assume that “new” means ready to use.
If you make one, start with a simple existing model and use our dedicated mold-making guides for the detailed techniques rather than trying to learn several advanced skills at once.
Whichever route you take, think through the finished candle before you begin.
Consider its shape, base, wick, mold support, pouring direction and how you’re eventually going to get it out.
Then make the candle.
Once you’ve successfully gone through that complete process, you’ll have a much better understanding of which direction you want to take next.
And one thing I particularly like about candles is that when the project is finished, you can actually use what you’ve made. Light it, create a little ambience, or give it to your partner, family member or friend.
That’s not a bad result from your first mold-making project.
Start simple, learn from the first one and make the next one better.
Author
Robby
Craft It All
Thank you or this. I was in San Diego recently and got to try candle making and enjoyed it so much I thought I must really try it when I get home. There are some weird and wonderful molds out there, but I will stick to your advice of keeping it simple so that I don’t make my life difficult.
I can see how easily air could be trapped inside the more intricate molds, and it is so much easier to get the candle out of a straight and thick mold. I loved experimenting with the different shades and colors. Now I just need to get my handle on getting the wick in the middle.
Hi Michel,
I am glad you found the post interesting and even helpful, air bubbles in your mold is one thing, but in your finished piece- even worse.
Rob