
 By Robby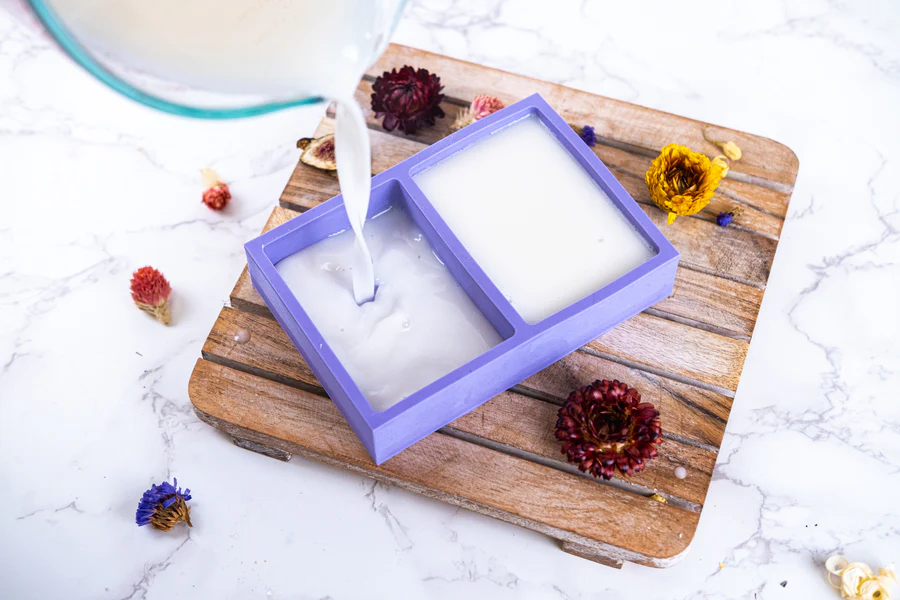
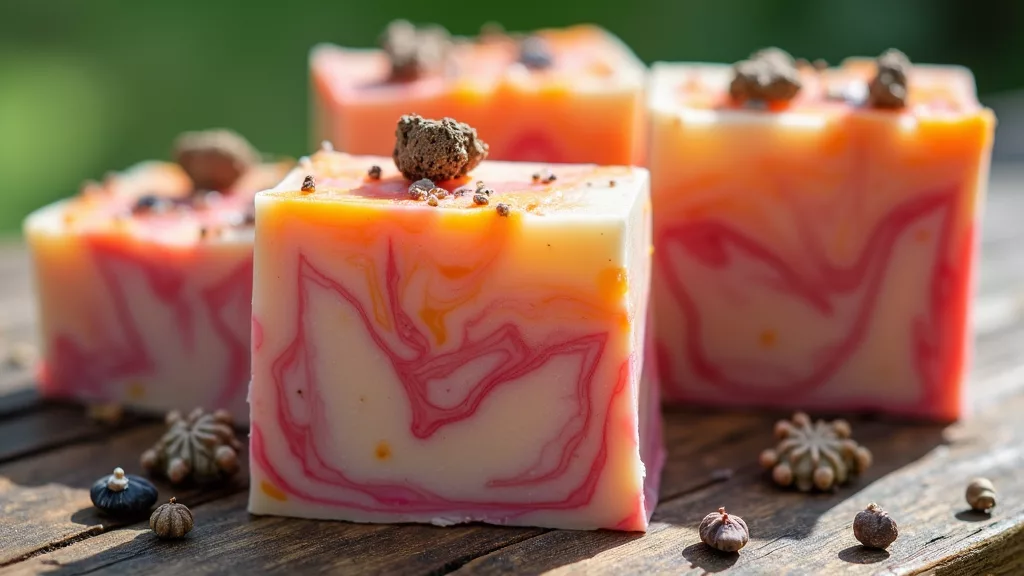
Table of Contents
Introduction to Melt and Pour Soap.
The way I first got into making soap came about when I was looking for other ideas, and possibly new revenue opportunities, within my precast company. After all, I had a dedicated research and development (R&D) department, and all of my staff knew I was always thinking about and experimenting with new ideas.
I also had hundreds of silicone molds in storage from years of making molds and working with different casting materials. So I took a few of the smaller ones out of storage and started experimenting with them.
I already had most of the tools and equipment I needed, so really, all I had to buy was some melt and pour soap base.
Melt and pour soap is one of the easiest crafts to get started with, but like almost every craft I’ve worked with, there are several perfectly good ways of doing the same thing.
The method I’ve put together below combines what I learned from those early experiments, my years of experience with molds and casting materials, and current research into the latest products and equipment available. It’s the approach I believe will give a beginner the best chance of achieving consistent results.
DIY Melt and Pour Soap Making
Melt and pour soap making is a great combination of creativity and simplicity. It’s an ideal project for anyone who enjoys hands-on crafts and experimenting with different designs.
Unlike making soap from raw ingredients, the soap-making stage has already been completed for you. You start with a ready-made soap base, melt it, customize it and pour it into your chosen molds.
For anyone interested in learning a little more about the process, the Handcrafted Soap and Cosmetic Guild has a useful introduction to melt and pour soap making.
That means you can concentrate on experimenting with colors, fragrances, textures, additives and designs without having to go through all the additional stages involved in making soap from scratch.
It can be used for your own soaps, gifts, experimenting with new craft ideas or even developing products for a small business.
This post contains affiliate links. If you buy through them, I may earn a commission at no extra cost to you.
Before You Start: Plan What You’re Making
Using my method, planning and preparing ahead makes everything much easier and avoids potential mini human meltdowns at key moments.
Choosing your molds first affects several of the other decisions you need to make, including how much soap base you’ll need and how much working space is required.
When I talk about designing your soap at this stage, I’m not necessarily talking about the shape of the finished bar. Your mold will normally determine that.
I’m talking about the colors, fragrances, textures, layers, finishes and overall appearance.
You may even decide to make a larger block or loaf of soap and cut it into individual bars once it has hardened. This can be particularly useful if you want bars of different sizes.
Step 1: Gather Your Supplies and Plan Your Design
Before getting started, have everything ready.
A well-prepared workspace makes the process much smoother and lets you concentrate on the creative part rather than hunting around for something while you have a container of melted soap waiting.
For your first experiments, I recommend starting with smaller molds. If the result isn’t quite what you wanted, you’ve used less material. And unless something has gone badly wrong, you can still use the soap.
Essential Materials
- Soap molds: Silicone molds are available in an enormous range of shapes and sizes.
- Melt and pour soap base: Choose a base suitable for the type of soap you want to make. Clear and white bases are good starting points, with many other formulations available.
- Colorants: Use colorants specifically intended for soap or cosmetic use.
- Fragrance: Use fragrance or essential oils that are suitable for soap and skin contact.
- Additives: Depending on your recipe, these could include oatmeal, prepared coffee grounds, suitable dried botanicals or cosmetic-grade decorative ingredients.
- Heat source: An electric melter, double boiler, suitable cooker or microwave can all be used.
- Thermometer: Useful for monitoring the temperature of your soap base, particularly as you move into more advanced techniques.
- Mixing tools: Heat-safe containers and suitable stirring utensils.
- Isopropyl alcohol: A small spray bottle of 91% or higher is useful for dealing with surface bubbles and when making layered soaps.
As an Amazon Associate, I earn from qualifying purchases.
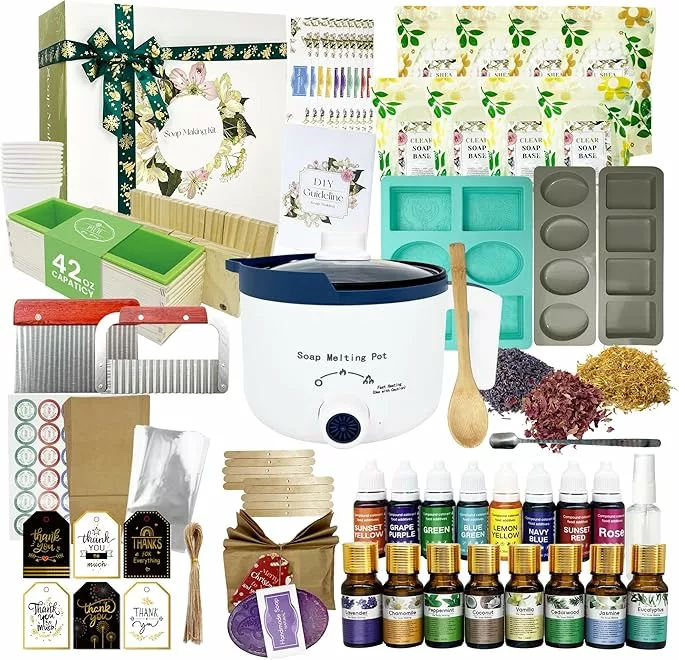
Starter kits containing many of these items are also available if you’d rather buy the basic equipment together. This complete kit pictured below is available on Amazon, a familiar and trusted shopping option for many readers, and includes everything needed to get started. To follow this suggestion click here
Plan Your Creative Direction
Before melting anything, decide roughly what you’re trying to produce.
- Choose a theme: Seasonal colors, floral designs or perhaps something completely different.
- Choose your fragrance: Think about how the fragrance fits the appearance and intended use of the soap.
- Consider texture and appearance: Do you want a smooth bar, an exfoliating soap, layers, embeds or decorative additions?
- Keep the first attempts simple: Learn what each ingredient does before trying to combine too many techniques at once.
Having a clear plan before melting your soap base will help you achieve more consistent results.
When I first started, I would jot down ideas and sometimes make a quick sketch to visualize what I was trying to produce. Today, of course, you can just as easily do this on an iPad or similar device.
Step 1A: Prepare Your Working Area
This is very important and often overlooked.
As with most materials being poured into molds, your molds need to sit level.
Soap is definitely one of those materials where this matters. If your mold isn’t level, sloping or wedge-shaped bars may be the final result. You can also end up overflowing one side, wasting material and creating even more cleanup.
Your work area should include a table or bench large enough for your equipment, soap base, colors, fragrances and any other ingredients you’re going to use.
I also recommend having a separate, properly levelled board or working surface large enough for all the molds you intend to pour during that session.
You can buy a suitable adjustable board or simply make one yourself by fitting levelling feet to a flat board.
And don’t assume that your lovely covered table is level. Many floors aren’t perfectly level, which means the table sitting on them won’t necessarily be level either.
Test Your Mold Layout Before You Start
Carry out a dry test layout of all your molds on the levelled area before melting any soap.
Everything should fit comfortably.
Don’t allow flexible silicone molds to overhang the edge of the board. Silicone is flexible and unsupported sections can droop, which can deform your finished soap.
Also check that each mold can maintain its intended shape once it’s filled.
I’ve bought some silicone molds that are essentially just a flexible piece of rubber. If the sides aren’t adequately supported, the weight of the liquid material can distort them.
Simple temporary supports can solve the problem.
Foam board and a hot glue gun can work wonders. For smaller areas, one of my “always on standby” products, modelling clay, can provide the extra support you need. For a slightly larger area, a small piece of board supported with modelling clay may be enough.
Finally, make sure all your molds are clean and ready to receive the soap before you install any temporary side supports.
Step 2: Melt the Soap Base
Melting your soap base correctly helps produce a smooth finished bar.
Too much heat can alter the soap and, if taken far enough, scorch it, so this isn’t a stage where more heat means faster and better.
Different bases and manufacturers can have different recommended working temperatures. Check the instructions supplied with the particular base you’re using rather than relying on one temperature for every product.
This is also where your thermometer becomes useful.
Before starting, double-check that you have enough melt and pour soap base for all the molds you intend to fill.
It’s better to have a little too much than discover halfway through the pour that you haven’t melted enough.
I always keep a small spare mold handy for leftovers. A simple square or round mold is ideal because the final level isn’t particularly important. Instead of wasting the remaining soap, you’ve made yourself another usable bar.
Melting Methods
- Electric wax or soap melter: Gives you good temperature control and can also be useful for other crafts.
- Double boiler: Place the melt and pour soap base in a heatproof container over gently simmering water and stir as it melts.
- All-in-one cooker: If you already own one with suitable temperature control, it may be another option.
- Slow cooker: Can be used, but monitor the soap temperature rather than simply leaving it unattended.
- Microwave: Heat in short bursts, stirring between each one. It works, although it isn’t my favorite method because I prefer having more control over the temperature.
Melting Tips
- Cut larger blocks of melt and pour soap base into reasonably small, even pieces so they melt more uniformly.
- Avoid overheating or boiling the soap.
- Stir slowly rather than whipping air into the mixture.
- Allow the base to cool appropriately before adding heat-sensitive fragrances or additives.
- Follow the particular soap base manufacturer’s temperature recommendations.
Taking your time here makes the following stages much easier.
Step 3: Customize with Color, Scent, and Additives For Melt and Pour Soap
This is where you can really start experimenting.
Color, fragrance, texture and other additives can completely change the appearance and character of a simple melt and pour soap base.
However, more is not always better. Different additives behave differently in soap, so start simply and change one thing at a time.
Color and Fragrance
- Colorants: Use colorants specifically suitable for soap and cosmetic use. Liquid soap dyes are generally straightforward for beginners. Cosmetic-grade mica can also be used, but it should normally be dispersed before being added rather than simply stirring dry powder into the soap base. Follow the colorant manufacturer’s instructions for the amount to use and recommended method of dispersion.
- Fragrance: Only use fragrance or essential oils suitable for use in soap and on the skin. Don’t simply add fragrance “to preference.” Check the manufacturer’s recommended usage rate for the particular oil you’re using and measure it rather than relying on the number of drops. More fragrance doesn’t necessarily produce a better bar, and too much can cause problems with the finished soap.
- Marbling and swirling: Using two or more colors can produce some very attractive effects, but timing and temperature make a difference. If the soap is too fluid, the colors may simply blend together. If it has cooled and thickened too much, creating a clean swirl becomes more difficult. This is one of those techniques that gets easier with practice.
Texture, Exfoliants and Decorative Additions
- Dried herbs and flowers: Use some caution here. Not every dried flower or botanical is suitable for putting into soap, and some can discolor, bleed or change appearance over time. When trying something new, make a small test batch first rather than committing an entire batch to an ingredient you haven’t used before.
- Oatmeal: Oatmeal can provide anything from very gentle texture to considerably stronger exfoliation depending on how finely it is ground. The grade you use should suit the type of soap you’re trying to make rather than simply adding whole or roughly chopped oats.
- Coffee grounds: Used coffee grounds can make an effective exfoliant, but they should be thoroughly dried before being added. Fresh coffee grounds can bleed color into the soap, so their preparation can make a noticeable difference to the finished bar.
- Poppy seeds: Poppy seeds can provide texture and exfoliation without needing to be ground. Like other solid additives, however, they may sink or float if the soap base is still very fluid when they’re added. Allowing the base to cool and thicken slightly can help keep them suspended more evenly.
- Shimmer and sparkle: If you want to add glitter or similar decorative effects, make sure the product is specifically intended and approved for cosmetic use. Ordinary craft glitter isn’t something I would recommend putting into a bar that’s going to be rubbed over someone’s skin.
Keep a Recipe and Notes for Every Batch
With melt and pour soap one habit I strongly recommend is keeping a record of every batch you make.
Treat it as your soap recipe book.
Record the soap base, quantities, melting and pouring temperatures, colors, fragrances, additives and anything you did differently.
If you produce a particularly good bar, you’ll know exactly how to make it again. Just as importantly, if something goes wrong, your notes may help you work out why.
This becomes even more useful as you start experimenting.
Change one ingredient or technique at a time and record the result. That way you’re learning from every batch rather than relying on memory.
Step 4: Pour, Shape and Set Your Melt and Pour Soap
Pouring requires a steady hand and a little patience.
Pouring Tips
- Pour steadily into your molds rather than splashing the soap in.
- If you’re creating layers, allow each layer to firm sufficiently before pouring the next.
- A light spray of 91% or higher isopropyl alcohol over the freshly poured surface will pop many surface bubbles.
- Isopropyl alcohol is also useful between layers to help them adhere to one another.
- Avoid moving flexible molds unnecessarily once they’re full.
Tapping a sturdy mold may sometimes help release trapped air, but be careful with very flexible silicone molds. This is another reason I prefer having them properly supported before pouring.
Setting and Cooling
Let the soap cool and harden at room temperature.
Depending on the size of the mold and the product you’re using, this may take several hours. For larger bars or blocks, leaving them overnight removes any temptation to unmold them while they’re still warm.
Once completely cool and firm, gently remove the soap from the mold.
Don’t routinely put melt and pour soap into the refrigerator or freezer to speed things up. Rapid chilling and subsequent condensation can contribute to the moisture problem known as glycerin dew or sweating.
If you’re experimenting with the final surface appearance, gentle steam can sometimes be used to improve the look of the exposed surface. If you try this, keep the steamer or steam iron away from the soap and use only the steam. Practice on an experimental bar first rather than your best batch.
Step 5: Finishing Touches and Packaging
Presentation matters, particularly if you’re making soaps as gifts or eventually thinking about selling them.
Finishing
- Trim rough edges carefully with a sharp knife or vegetable peeler.
- Allow the soap to become completely cool and firm before trimming or packaging.
- If you’ve made a loaf or large block, cut it into individual bars only after it has fully hardened.
One of the advantages of melt and pour is that you don’t have to wait through the several-week curing process associated with some other soap-making methods.
Once your melt and pour soap is completely cool and hard, it can be used.
Watch Out for Glycerin Dew
You may occasionally notice small beads of moisture appearing on the surface of melt and pour soap.
This is commonly called sweating or glycerin dew.
The glycerin in the soap attracts moisture from the surrounding air, particularly in humid conditions. It doesn’t necessarily mean you’ve made the soap incorrectly.
Once the bars are completely cool and hard, wrapping them promptly helps protect them from atmospheric moisture.
Packaging and Storage
- Wrap finished bars closely to reduce their exposure to moisture.
- Clear wrapping allows decorative soaps to remain visible.
- Decorative paper, boxes, ribbons or fabric pouches can then be added around the moisture-resistant wrapping.
- Add a label or tag identifying the soap, fragrance and ingredients where appropriate.
- Store finished bars in a cool, dry place away from excessive heat and humidity.
If you’re planning to sell your soap rather than simply make it for yourself or as an occasional gift, check the labelling and cosmetic-product regulations that apply where you’re selling. That’s a separate subject in its own right.
Step 6: Troubleshooting and Refining Your Technique
Even with careful preparation, things don’t always go exactly to plan.
That’s part of experimenting.
Surface Bubbles
Stir the melted base gently rather than vigorously. Once poured, a light spray of high-strength isopropyl alcohol can remove many bubbles from the surface.
Uneven Color
Add color gradually and mix it thoroughly. If you’re using mica or another powdered colorant, make sure it has been properly dispersed according to the manufacturer’s instructions.
Additives Sinking
Your soap may simply be too hot and fluid when the solid ingredients are added.
Allowing the base to cool and thicken slightly before pouring can help keep some additives suspended more evenly.
Layers Separating
Make sure the previous layer has developed enough structure to support the next one, but don’t simply pour another layer on and assume it will bond.
Spraying isopropyl alcohol between melt and pour layers helps them adhere.
Scent Fading
Use fragrance or essential oils suitable for soap, follow their recommended usage rates and avoid adding them while the base is unnecessarily hot.
Soap Sweating
This is usually glycerin dew caused by the soap attracting moisture from the atmosphere.
Allow the soap to cool completely and then wrap it closely, particularly if you live somewhere humid.
And remember your recipe notes.
If something unexpected happens, record it along with anything you changed. Troubleshooting becomes much easier when you’re working from facts rather than trying to remember exactly what you did three batches ago.
Step 7: Expanding Your Projects
Once you’ve mastered the basics, there are almost endless possibilities.
You can start experimenting with:
- Layered soaps using different colors or fragrances.
- Embedded designs made by placing smaller soap shapes inside larger bars.
- Exfoliating soaps using carefully selected additives.
- Seasonal soaps for holidays and special occasions.
- Your own custom silicone molds.
- Larger loaf molds that can be cut into individual bars.
- More advanced color and swirling techniques.
The important thing is not to try everything at once.
Experiment with one new technique at a time and keep recording what you did.
That’s how you gradually develop your own methods and, eventually, your own recognizable style.
Safety Tips for DIY Melt and Pour Soap Making
Melt and pour soap is beginner-friendly, but you’re still working with hot liquid, electrical appliances, fragrances and other ingredients.
A few basic precautions make sense.
- Handle hot soap carefully. Use suitable heat-resistant containers and utensils and protect yourself from spills.
- Make sure containers used in a microwave are genuinely microwave-safe.
- Don’t overheat the soap base.
- Work in a well-ventilated area, particularly when handling fragrances.
- Use only colorants, fragrances and additives that are appropriate for soap and skin contact.
- Check supplier safety and usage information for unfamiliar ingredients.
- Keep concentrated fragrances, hot soap and equipment away from young children and pets.
- If you’re involving children in the creative side of soap making, an adult should handle the hot soap and concentrated ingredients.
Melt and pour avoids some of the more demanding stages involved in making soap from raw ingredients, but common-sense workshop practices still apply.
Final Thoughts and Next Steps
Melt and pour soap is one of those crafts where you can make something quite simple on your first attempt and then spend years exploring what else is possible.
That’s part of what attracted me to it.
I came to soap making through molds and casting rather than through traditional soap making, and that opened up a completely different way of looking at it. Once you understand the basic process, you can start thinking about the mold itself, the shape, surface finish, colors, textures, embeds and all the other things that can make a bar uniquely yours.
And from here there are several directions you can go.
You could design your own model and make your own silicone soap mold. click here to go to our how to make a silicone mold
You could experiment with different soap bases, exfoliants, colors or more advanced designs.
Or you could take many of the same molds, tools and skills and try another casting craft altogether.
Candles are an obvious example.
Different material, different rules, but many of the same principles of preparation, temperature control, mold choice and experimentation apply.
Whatever direction you choose, start small, keep your recipes and notes, and change one thing at a time.
That’s how experiments become repeatable results.
Contact Us
I hope you’ve found this guide to melt and pour soap helpful. If you have a question or something you think I’ve missed, feel free to get in touch.
This guide makes DIY melt and pour soap making sound so fun and accessible! I love how it emphasizes creativity—there’s so much room for personalization with colors, scents, and textures. It’s great that you can make unique soaps without the hassle of handling raw ingredients. Whether for personal use or gifting, this project seems perfect for anyone looking to get crafty. Plus, it could even turn into a small business venture with some practice!
Hi Zac,
Thanks for your positive comments, and yes it is one of the less complicated crafts available to almost anyone.
Robby