
 By Robby
Last updated: September 3, 2026
Table of Contents
Introduction
Making your own stepping stones does not have to involve expensive molds, specialist equipment or advanced mold-making skills. With a few lengths of wood, some screws and a level, preferably smooth surface to work on, you can make simple reusable molds in almost any square or rectangular size you need. Do not attempt a circular mold for your first project, as it is the most difficult shape in this category to make accurately.
This is an ideal first cast-stone project for the average DIYer. The basic mold is easy to assemble, the materials are inexpensive and you can use it repeatedly to make a garden path, a small patio or individual stepping stones placed through a lawn or planted area.
I will take you through the complete process in five straightforward steps, from choosing the mold size and creating the finished surface to mixing, pouring and removing your first stepping stone. Once you have mastered the basic method, you can begin experimenting with colors, textures, decorative stone and other finishes to make each project your own.
Other Ways to Complete This Project
There are other ways to make stepping stone molds and mix the concrete, and experienced contractors may use different materials or equipment. The method described here is intended to provide the average DIYer with a simple, flexible and affordable way to produce good results without specialist mold-making or cutting equipment.
Before You Start Making Your Stepping Stone Molds
Choose a firm, level working surface with enough room for the molds and the materials you will use. A bench or table around 30 to 32 inches high makes the work more comfortable, although a smooth, level floor or paved area can also be used.
Before buying or cutting any wood, decide on the size and thickness of your stepping stones and check that the molds will fit comfortably within your available working area. Remember that the larger the stepping stone, the heavier it will be to move and install once it has been cast. A thicker product may also be needed if you expect heavier traffic or intend to make anything larger than 24 x 24 inches. For your first project, I recommend staying at or below 24 x 24 inches. You will also need a larger working space around every side of the mold for screeding, tapping the frame and removing the finished stepping stone. If your bench or working surface is only 30 to 32 inches wide, a 24 x 24-inch mold is about the largest practical size.
1. Choose the Material for Your Stepping Stone Mold
Wood is the simplest and most practical material for making these stepping stone molds. It is inexpensive, easy to cut and readily available from Home Depot, a lumberyard or most local building-supply stores.
Choose straight lengths without serious twists, bows or splits, because any distortion in the wood will be reproduced along the edges of your stepping stones. The depth of the wood will determine the thickness of the finished stone, so decide this before buying your material. For most ordinary garden stepping stones, wood approximately 1 1/2 inches deep is suitable. This is close to the actual thickness of most nominal 2-inch lumber.
Avoid CLS, Canadian-style stud lumber or similar economical framing products. These are manufactured to smaller finished dimensions and usually have noticeably rounded edges, both of which will affect the finished stepping stone. Check the wood with a tape measure rather than relying on its nominal size, and choose material with square corners wherever possible. A very slightly eased edge should be fine.
I would not recommend making the stepping stones more than 2 inches thick unless their size or intended use requires the additional strength. The extra concrete will make each stone considerably heavier to move and install.
2. Choose the Size of Your Stepping Stones
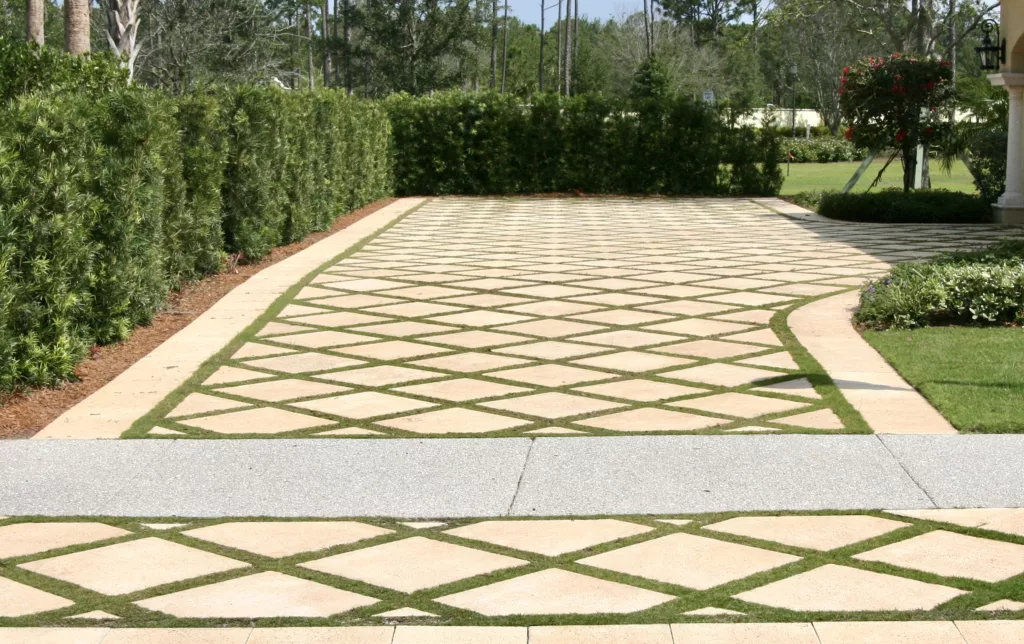
Common nominal names for homemade stepping stones and pavers include 12 x 12, 16 x 16, 18 x 18 and 24 x 24 inches. When the stones will be installed together with 3/8-inch joints, their corresponding finished sizes become approximately 11 5/8, 15 5/8, 17 5/8 and 23 5/8 inches square. The joint completes each installed stone’s intended modular size.
Many other sizes can be made with the same mold sides using the adjustable pinwheel method explained in Step 3. If the four sides are long enough for your largest planned paver, they can later be repositioned to produce smaller square or rectangular pieces.
This is particularly useful when planning a path or patio because you can work backward from the overall dimensions and choose a paver size that avoids cutting. For example, a 28-inch-wide sidewalk can accommodate two nominal 14-inch pavers, each cast at 13 5/8 inches to allow for the joints. A patio measuring 105 inches across can be completed with seven nominal 15-inch pavers, each cast at approximately 14 5/8 inches. Simple calculations like these can eliminate difficult cuts, reduce waste and produce a more evenly planned layout.
If your layout does not require a custom size, I recommend starting with a nominal 12, 16 or 18-inch paver for your first project. These sizes are useful and reasonably easy to handle. A 24-inch paver covers more ground but will be considerably heavier. At approximately 1 1/2 inches thick, it may weigh around 70 pounds, depending on the concrete mix.
Always set the mold by measuring the open space inside the wooden frame, because this determines the finished size of the stepping stone. Once you have chosen that size, check that the complete frame will fit on your working surface with enough space around it.
Safety Considerations
Wear suitable eye protection, gloves and footwear throughout the project. Dry cement and concrete materials can irritate the skin and eyes, while the dust created during handling and mixing should not be inhaled. Follow the safety and protective-equipment instructions supplied by each material manufacturer, and mix in a well-ventilated area.
Use suitable respiratory protection when opening, measuring or mixing dry cement, sand, pigments and fibers. Keep hands away from moving mixing paddles, disconnect power tools before making adjustments and follow the manufacturer’s instructions for every tool you use.
Remember that the larger pavers can be very heavy. Use safe lifting methods and ask for assistance rather than attempting to move a 24-inch paver alone. When storing pavers on edge, support them securely so they cannot fall.
For broader guidance before beginning, read our safety in all crafts guide.
3. Cut and Assemble Your Pinwheel Stepping Stone Mold
You will need a tape measure, pencil, square, saw, drill, small pilot drill bit, screw gun and suitable wood screws. Screws approximately 2 1/4 inches long should suit most wood of this size.
Before cutting, measure the wood’s actual thickness rather than relying on its nominal size. Cut four pieces to the same length, making them long enough for your largest planned mold and allowing extra length for the overlapping corners. Sides made for a 24-inch mold can later be repositioned for smaller standard or custom sizes.
You can divide two 8-foot lengths into three approximately equal pieces, giving you six mold sides. If you can transport it, one 10-foot length can be divided into four pieces of approximately 30 inches. Remember to allow for the width of the saw cuts.
The sketch below shows the pinwheel arrangement, with two screws at each overlapping corner and diagonal measurements used to check that the frame is square.
Lay four pieces on a flat surface, with each one extending beyond the next to form the pinwheel arrangement. Adjust them until the internal opening matches the required finished size.
Use a square at each corner and drill pilot holes before driving two screws into every joint. The pilot holes help prevent splitting and allow the frame to be disassembled and reassembled more easily. Do not bury the screw heads deeply. Moisture can swell the wood around them, and excess concrete may cover their positions, making them difficult to remove.
The projecting ends leave space for new screw positions when changing sizes or when the original holes become worn. They can also accommodate 90-degree corner blocks to help support the frame.
Check the internal dimensions and measure both diagonals. Adjust the frame until the diagonals are equal, but do not rely on the corner screws alone to keep it square. Hand-cut ends may be slightly out of square, and overtightening the screws can pull the frame out of alignment.
Tighten the screws only enough to hold the joints together, then secure the correctly positioned mold with clamps, screws, corner blocks or suitable weights. Recheck the internal dimensions and diagonals before pouring, and leave enough clear space around the frame for screeding off the concrete mix.
Once assembled this way, the same mold sides can be repositioned to cast standard or custom square and rectangular pavers, avoiding many difficult and messy diamond-blade cuts.
4. Prepare the Finished Surface
The surface beneath your mold will form the visible face of the finished stepping stone. Before pouring any concrete, make sure the mold is sitting on a firm base and decide what appearance you want the finished surface to have.
The easiest option is a sheet of formwork plywood with one good face, which will produce a simple but more than adequate finish. Other smooth surfaces, including Formica and even an existing concrete slab, can also work. Certain types of builder’s construction paper provide another useful option when you want a consistent finish.
Thick plastic sheeting laid over a smooth base can produce a smoother surface, but it is not always easy to keep perfectly flat. Very smooth plastic may also produce an almost polished finish that could become slippery when wet.
Whichever surface you choose, the most important requirement is that it is level in both directions. Any slope or unevenness will affect the thickness and shape of the finished stepping stone. A wooden working surface has the added advantage of allowing you to screw the mold frame securely into position if needed.
Apply an even coating of cooking oil to the chosen surface and the inside faces of the wooden stepping stone mold. Some absorbent surfaces may require a second coat. Do not allow the oil to collect in puddles, as these may mark the finished face. Any slight oily residue remaining on the stone will gradually weather away outdoors.
A textured surface is generally more forgiving of small imperfections and helps disguise any small surface air holes that remain after the concrete has been compacted. You can arrange small decorative stones, shells or other suitable materials face down inside the mold before pouring. For a simpler random texture, scatter coarse rock salt or sand over the surface and wash away the loose material after the stone has hardened. The salt will leave small indentations, while the sand will produce a finer, grainier finish.
Keep decorative materials reasonably small and avoid leaving large gaps around them. If the pieces are too large or poorly positioned, the concrete may flow underneath and hide much of the decoration.
Once the stepping stone mold is secure, the release coating has been applied and any texture or decoration is in position, you are ready to mix and pour the concrete.
5. Mix and Pour Your Stepping Stones
Choosing and Measuring the Materials
Use a 4-to-1 mix by weight: four equal parts aggregate to one part Portland cement. The aggregate consists of three equal-weight bags of sand-and-gravel concrete aggregate blend, containing no stone larger than 3/8 inch, plus one equal-weight bag of concrete sand.
With 50-pound bags, the complete batch consists of:
- Three 50-pound bags of sand-and-gravel aggregate blend
- One 50-pound bag of concrete sand
- One 50-pound bag of Portland cement
These five bags produce approximately 250 pounds of dry mix before water, pigment and fibers are added.
The additional concrete sand helps produce a denser, more attractive finished face. Limiting the larger aggregate to 3/8 inch also helps the mix reach the corners and reduces the chance of stones showing through the face of a relatively thin paver.
As an approximate guide, a 1 1/2-inch-thick stepping stone will require:
- 12 x 12 inches: approximately 18 pounds of mix
- 16 x 16 inches: approximately 32 pounds
- 18 x 18 inches: approximately 40 pounds
- 24 x 24 inches: approximately 70 pounds
After water is added, a complete 250-pound dry batch should produce approximately fourteen to fifteen 12-inch pavers, eight 16-inch pavers, six 18-inch pavers or three 24-inch pavers, with enough mix usually remaining for one or more smaller pieces.
These figures allow for the finished pavers being 3/8 inch smaller in both directions, together with some water retention and air trapped within the mix. The precise yield will still vary with the mold depth, consistency and compaction, and a small amount will remain attached to the mixer, buckets and tools.
Prepare additional molds for smaller pavers, border pieces or any special-sized pieces required for the layout. This will use the remaining mix efficiently and may avoid making a second batch.
The actual quantity will vary with the mold depth, materials, compaction and amount of water used.
Use white Portland cement for light or pastel colors. Powdered pigment must be weighed accurately and the quantity recorded so the color can be reproduced. Do not measure pigment or cement with kitchen spoons or cups, because these materials settle and bulk up too easily for volume measurements to remain consistent. A postal scale is ideal, although an accurate kitchen scale may also work.
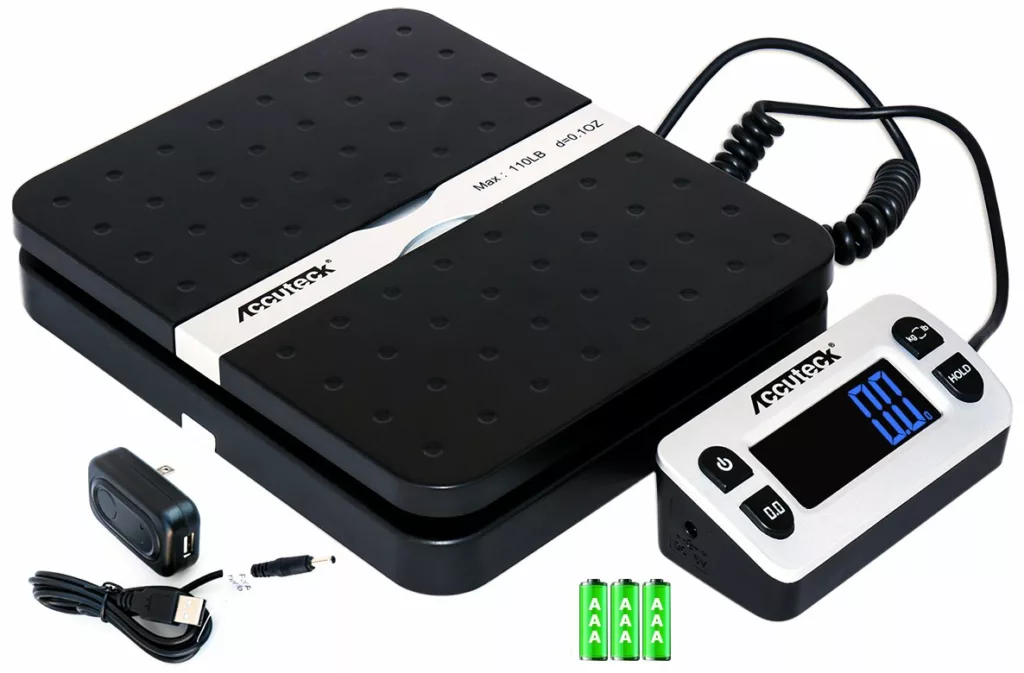
accurate kitchen scale may also work.
Mixing the Concrete
Use a concrete mixer or a heavy-duty drill and mixing paddle. Hand mixing is unlikely to produce consistent results, particularly when pigment is being used.
The same 250-pound dry mix can be divided into three 5-gallon bucket batches. Use one complete 50-pound bag of sand-and-gravel aggregate blend in each batch. Divide the concrete sand and Portland cement equally by weight into three portions.
Each bucket receives:
- One complete bag of sand-and-gravel aggregate blend
- One-third of the concrete sand
- One-third of the Portland cement
- One-third of the pigment
- Approximately one-third of the fibers
Pigment must be divided accurately by weight. Depending on their type, fibers may fluff up and be difficult to weigh in small quantities. Because these pavers are nonstructural, dividing the fibers into three similar amounts is normally sufficient. I often use the same-sized handful for each batch.
Each bucket may eventually require approximately 0.9 to 1.2 gallons of water, depending on the moisture already in the materials. Begin with only 1/2 to 3/4 gallon and add the remainder gradually.
If your mixer can safely handle the complete batch, all five bags go into the same mix. There is no need to divide the aggregate blend, concrete sand or cement. Only the pigment and fibers need separate measuring. Begin with approximately 1 3/4 to 2 gallons of water, then add more gradually as required.
For either method, start with part of the water and blend in the pigment. Add the cement, followed by the concrete sand, aggregate blend and fibers. Allow each material to mix thoroughly as it is introduced.
The mixture may appear wet before all the sand and aggregate have been added, so do not add the remaining water too quickly. The finished mix should reach the corners without becoming wet and sloppy. Too much water can weaken the paver, alter its color and increase shrinkage.
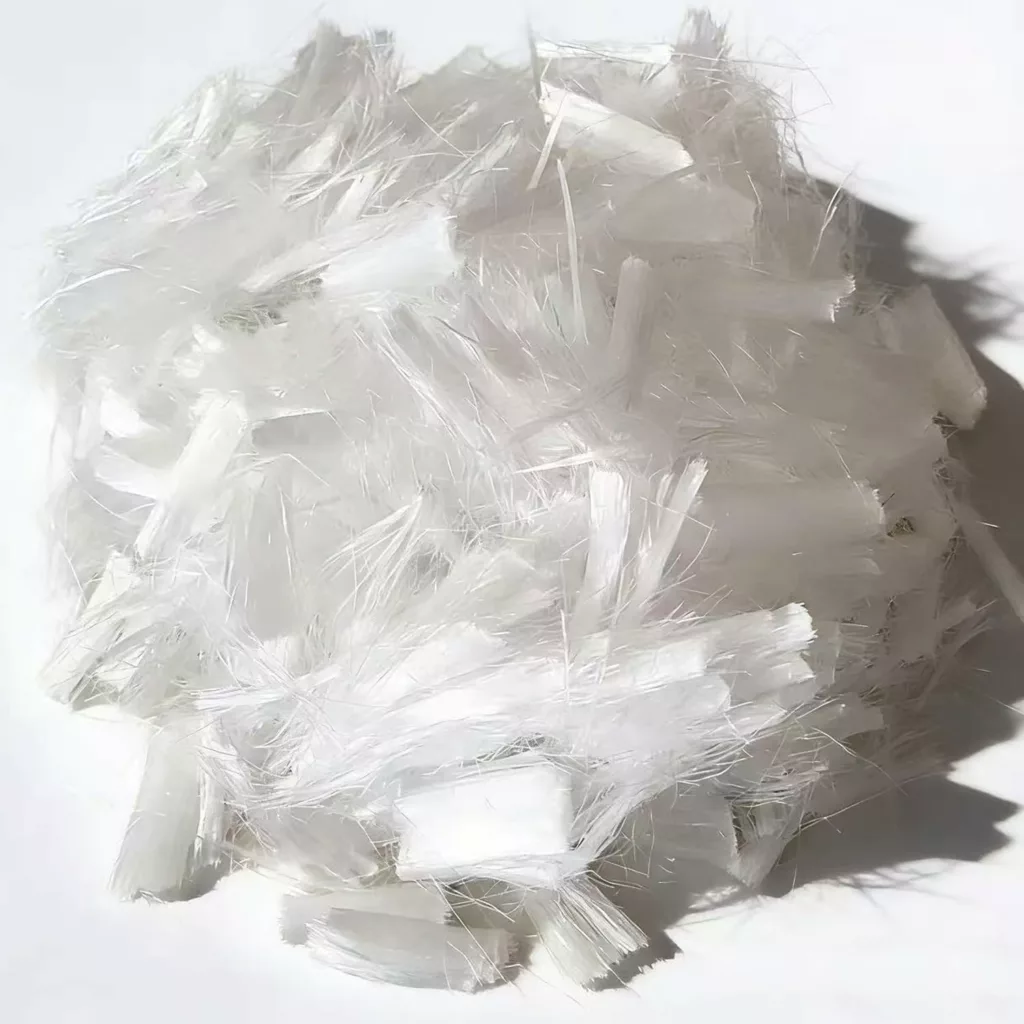
Concrete reinforcing fibers provide important additional resistance to cracking in these relatively thin products. I successfully manufactured similar nonstructural products in Florida for approximately 20 years using concrete sand, cement and fibers without larger aggregate. That experience showed me how valuable fibers can be, although they cannot compensate for an excessively wet or incorrectly proportioned mix.
Filling and Finishing the Mold
Place enough mix around the perimeter to cover the base, then form a larger pile in the center and gradually work it toward the corners. Tap along the upper outside edge of the frame with a hammer or rubber mallet to release trapped air. Do not strike hard enough to move the mold. You should begin to see small air bubbles rising to the surface.
Fill the mold completely and use a straightedge to screed the concrete level with the top of the frame. Give the back a rough trowel finish, allow it to set up slightly and then trowel it again. Although this face will be hidden after installation, keeping it flat will make the paver easier to lay evenly.
Curing, Demolding and Storing the Pavers
Depending on the weather and working location, cover the filled mold to prevent moisture from escaping too quickly. Leave it undisturbed for at least 24 hours, and longer in cool conditions, before removing the frame. Once the initial set has occurred, lightly wetting the backs can assist curing. Concrete gains strength by curing, not simply by drying.
To remove the mold, first take out any screws used to secure it to the working surface. Then remove the screws from one corner of the pinwheel frame. Releasing one corner is normally enough to loosen the sides and allow the complete frame to be lifted away.
If possible, return each frame to the same position for the next pour. Mark the frames and their locations so they can be reassembled consistently.
The edges of newly cast pavers can still be damaged easily. After demolding, carefully remove any thin fins or excess cement paste that seeped beneath the frame using a scraper or trowel.
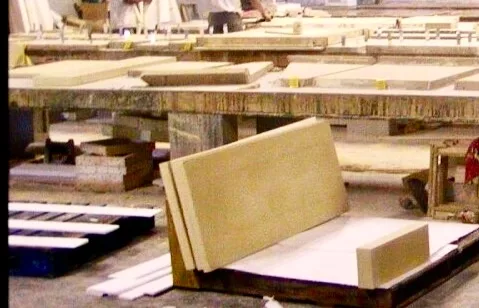
Once the pavers are firm enough to handle safely, store them upright on at least two wooden support strips and lean them securely against something solid. This is their strongest orientation, but they must be supported so they cannot fall or place uneven pressure on a corner.
Allow the pavers to continue curing before installation. Temperature, humidity, weather and the materials used will all affect how quickly they develop sufficient strength.
Before starting, work out how many full and cut-down pieces the project requires. This will help you prepare enough molds and use each batch batch efficiently.
The 5 Critical Points
Take extra care with these five points, as each can affect the finished paver:
- Use a secure working surface that is level in all directions.
- Square the molds and check the diagonals.
- Do not forget the release oil.
- Weigh the materials for consistency.
- Follow the mixing instructions carefully.
Materials and Tools
The following list brings together the principal materials and tools used throughout this project. You may already own many of them, and suitable alternatives can often be used. I have include links for some.
As an Amazon Associate I earn from qualifying purchases.
Recommendations
Below are links to some of the less familiar materials and tools used in this project. My DeWalt mixing drill is still working after 13 years, which speaks for itself. The mixing paddle is the correct type for concrete and uses the same design as the one I still use.
I have not personally used the featured scale, but I selected it for its suitable weighing range, separate offset digital display as the flat screen ones become very hard to read, very quickly, and reasonable price. I have also included the same type of polypropylene fibers I use and an uncolored rock salt suitable for creating a textured finish.
Materials
- Straight nominal 2-inch lumber with square or only slightly eased edges
- Approximately 2 1/4-inch wood screws
- Formwork plywood or another suitable level casting surface
- Cooking oil and a brush for applying it
- Sand-and-gravel concrete aggregate blend with no stone larger than 3/8 inch
- Concrete sand
- Gray or white Portland cement
- Powdered concrete pigment, if required
- Concrete reinforcing Polypropylene fibers
- Decorative stone, shells, coarse rock salt or sand, if required
- Plastic sheeting for covering the concrete during curing
Tools
- Tape measure
- Carpenter’s square
- Pencil
- Hand saw or power saw
- Drill and small pilot drill bit
- Screw gun and suitable driver bit
- Heavy-duty drill and concrete mixing paddle, or a concrete mixer
- 5-gallon mixing buckets
- Suitable weighing scale
- Shovel or scoop
- Hammer or rubber mallet
- Straightedge for screeding
- Concrete finishing trowel
- Clamps, corner blocks or suitable weights
- Scraper for removing thin concrete fins after demolding
Start with One Simple Mold
Making your own stepping stones does not need to begin with specialist equipment or a complicated mold-making process. Start with one manageable mold, take your time setting it square and level, and concentrate on producing a strong, consistent first paver.
Once you are happy with the result, the same pinwheel mold can be adjusted to make different sizes, complete a path or patio without awkward cuts and experiment with colors, textures and decorative finishes. If you later want to reproduce more detailed shapes or surface designs, our beginner’s guide to making rubber molds explains how to take the process further.
There is something particularly satisfying about finishing a path or patio with pieces you have made yourself, especially when they fit the space without needing to be cut. Start with one mold and one paver, learn from the result, and the rest of the project should become much easier. By following this guide, I hope you can avoid some of the mistakes I made while learning the process.
Robby